Administration
This page covers day-to-day administration of a running TRAPPER Expert
instance: managing users, the species taxonomy, AI providers,
classification projects, deployments, and AI classification jobs. The
operations listed here all happen through the Django admin interface
(/admin/) and a handful of management commands. Cross-system
concerns — bringing the stack up, upgrading, runtime configuration —
live in Installation and Configuration.
The page is organised as follows:
User administration
Registered users appear in the User changelist
(/admin/accounts/user/). Newly registered users have is_active=False
and no project roles, so they cannot log in or work on projects yet.
Activating users and granting project roles is done with the admin
actions at the bottom of the changelist — select rows with the
checkboxes, pick the action from the dropdown, click Go.
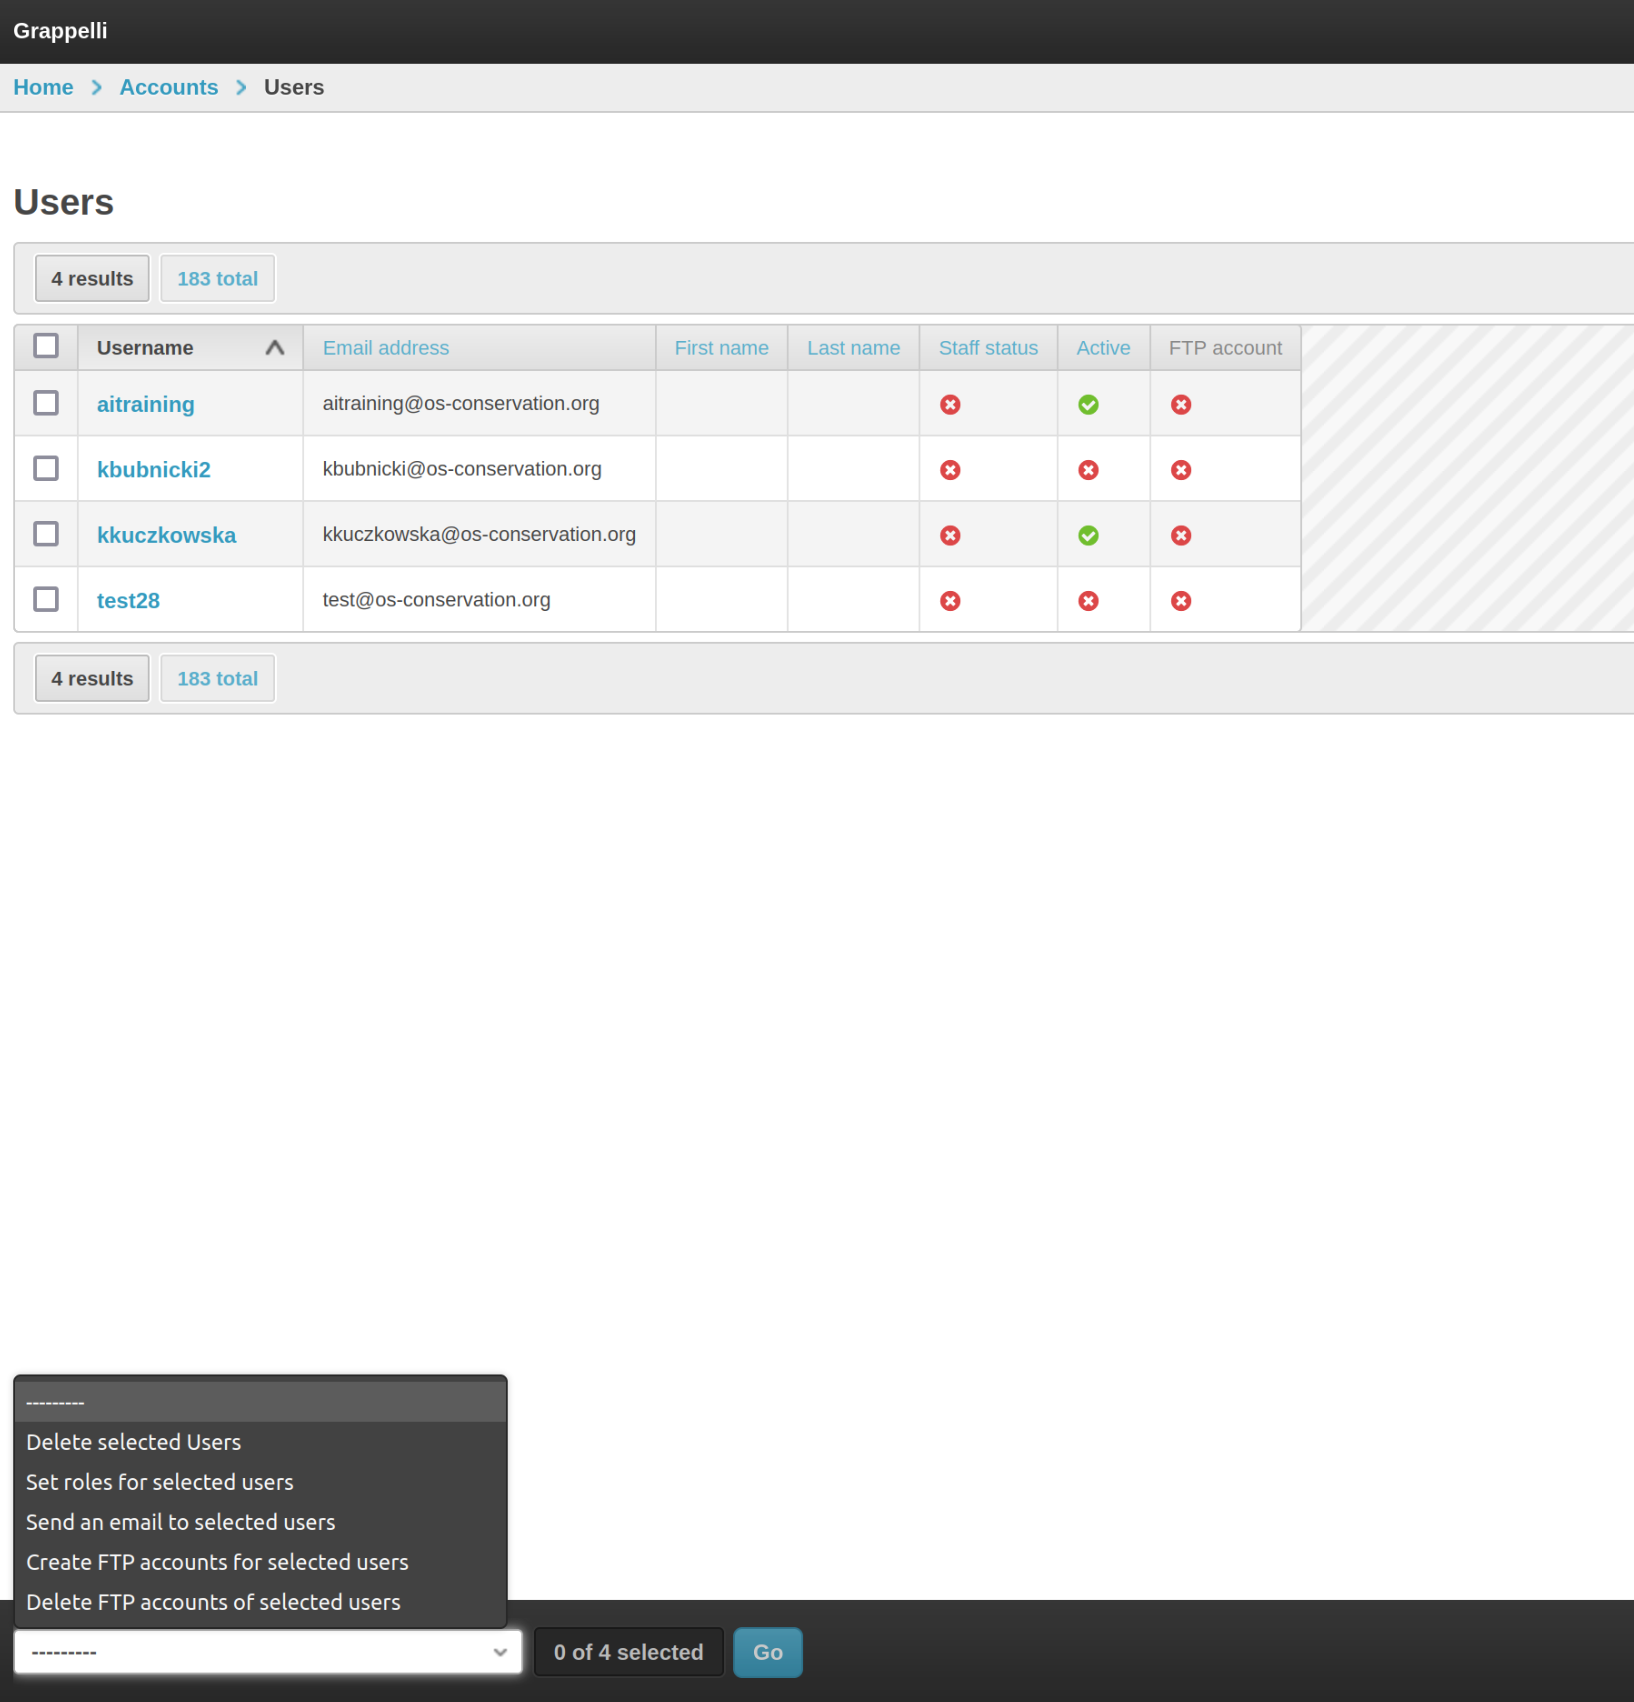
The User changelist with the actions dropdown.
Set roles for selected users
Adds the selected users as members, managers, or owners of one or more
Research projects and / or Classification projects. Optionally
flips is_active to True so users can log in immediately.
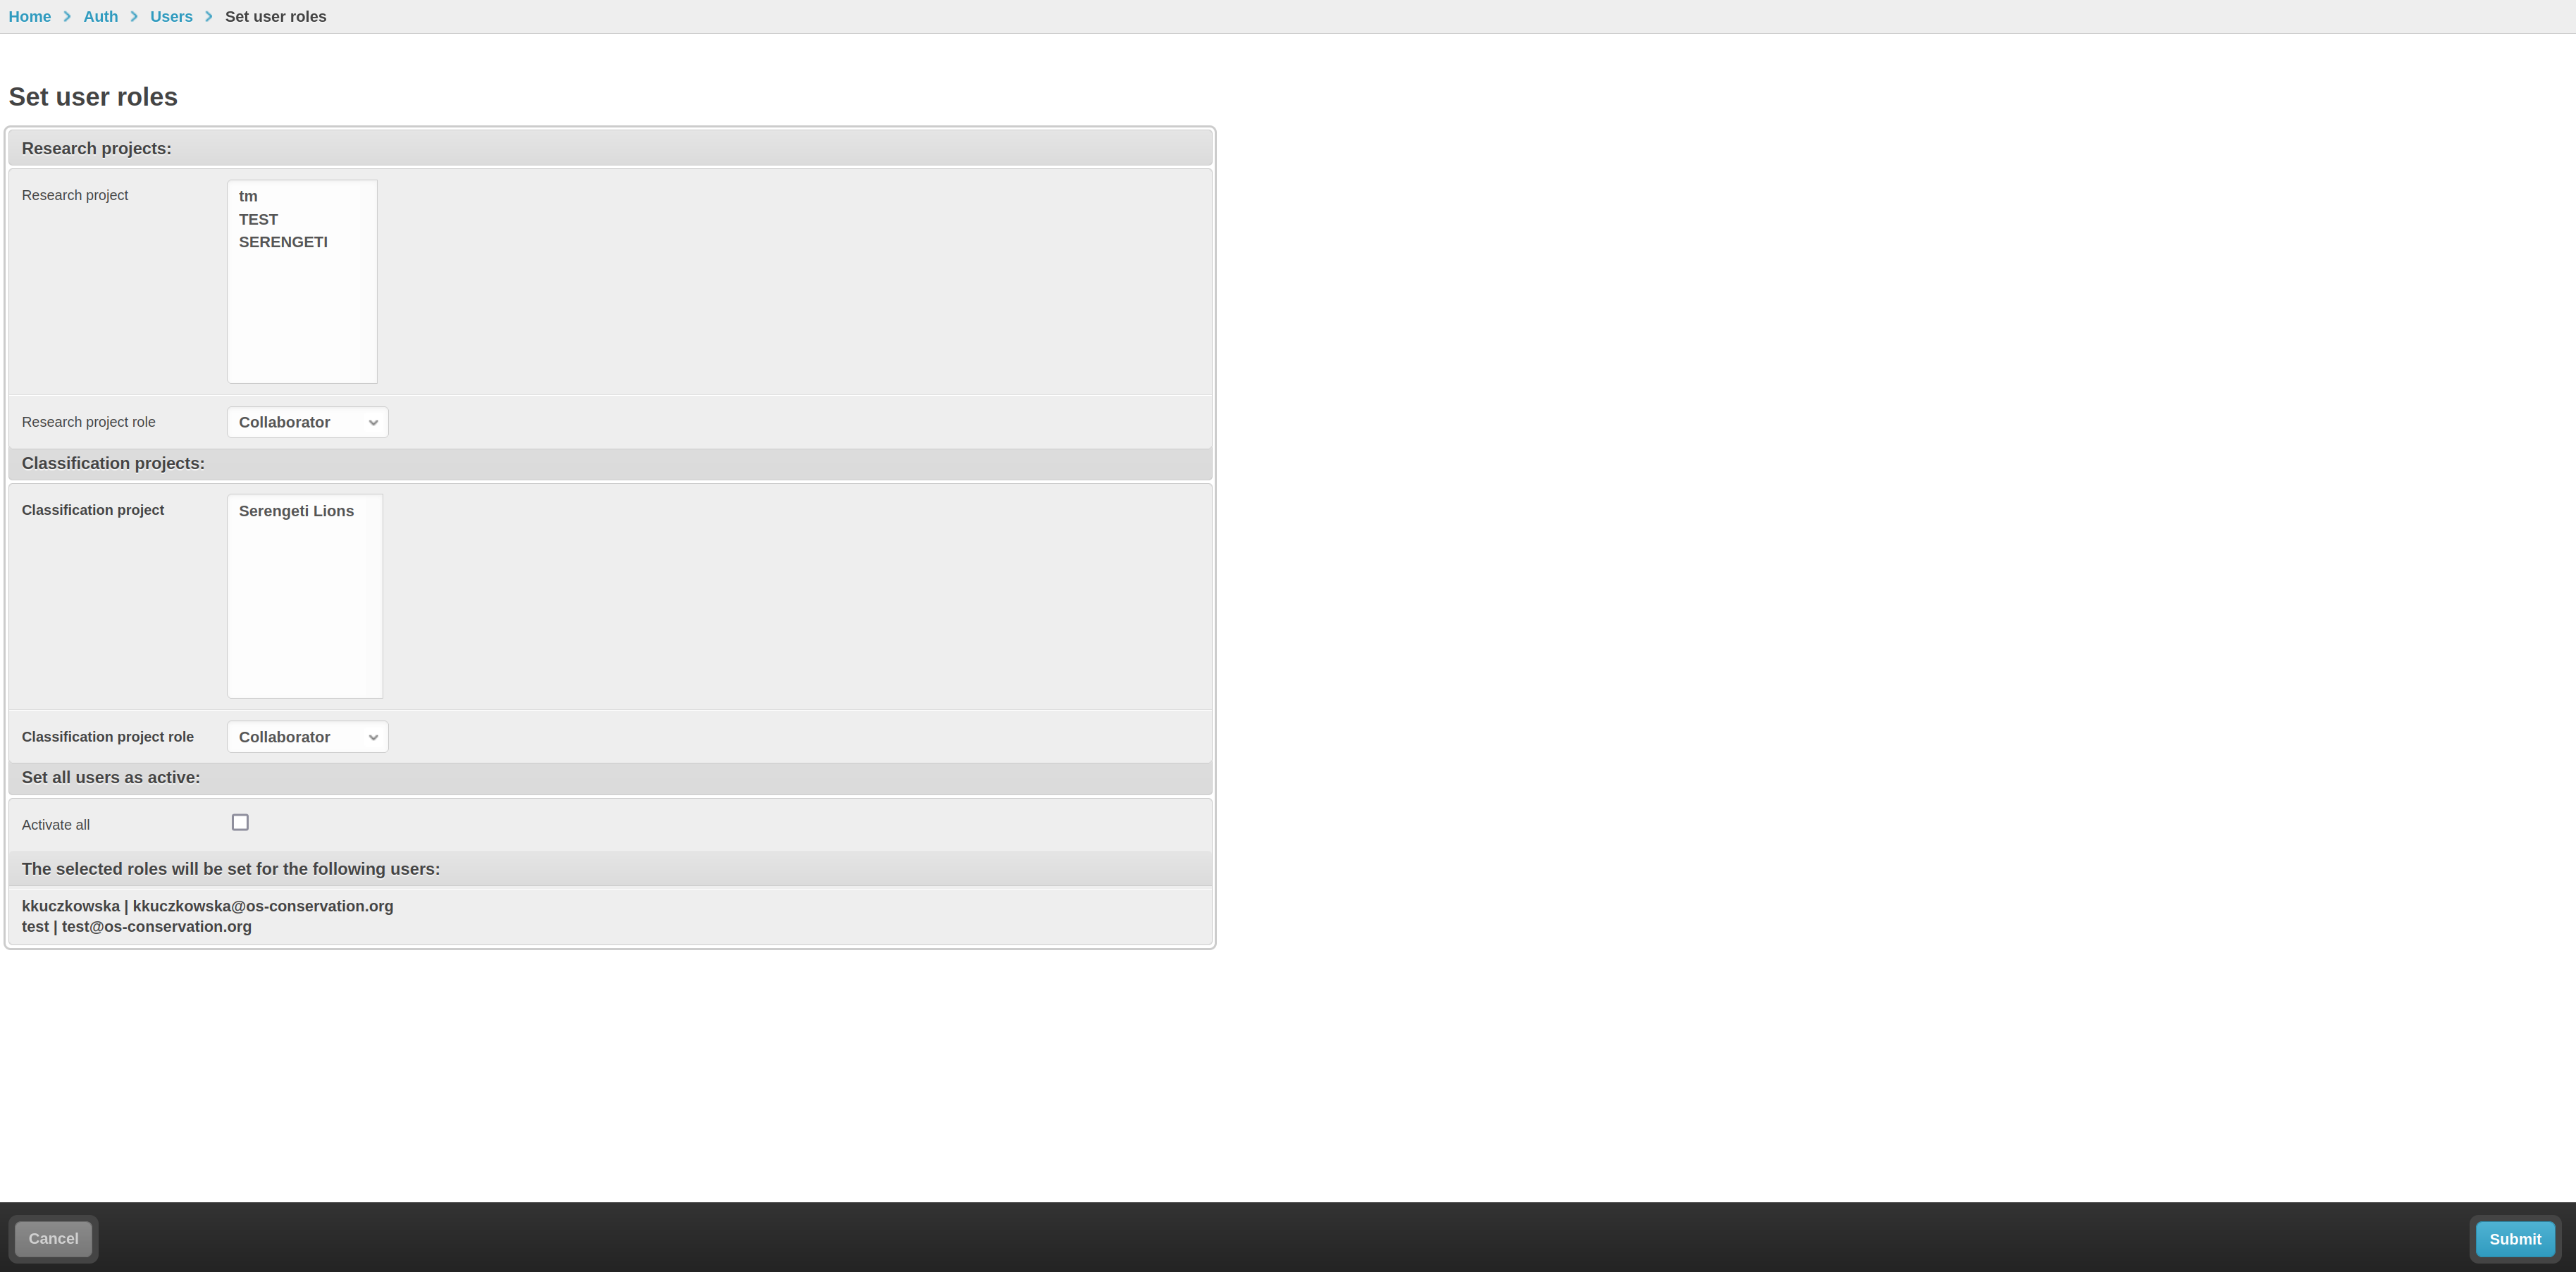
The role-assignment form. Project pickers are auto-complete fields.
Example. A new student joins your team. You select their User row,
choose Set roles for selected users, click Go, then in the form pick
the research project, give them MEMBER role on Research and
ANNOTATOR role on Classification, tick Activate selected users,
and submit.
Create FTP accounts / Delete FTP accounts
Trapper’s FTPS endpoint (Pure-FTPd) authenticates users against the
Trapper account database. The two actions
Create FTP accounts for selected users and Delete FTP accounts
toggle that bridge on or off, and create / clean up the per-user
directory layout in EXTERNAL_MEDIA.
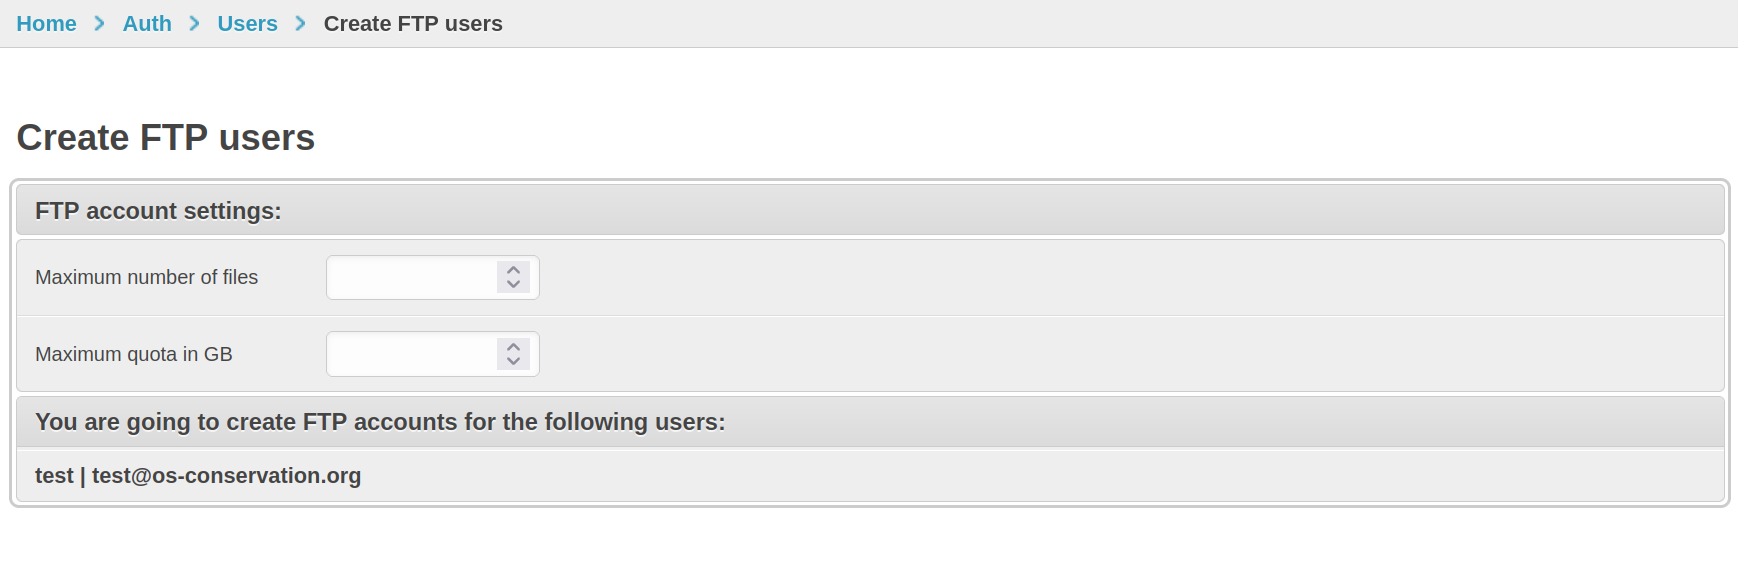
The form. The optional quota is in megabytes; leave empty for “no quota”.
After creating an FTP account, the user can connect with their Trapper email + password to upload data via FTPS. See Uploading data with Trapper Tools (end-to-end) for the trapper-tools workflow that uses this endpoint.
Mail users
Send a one-off custom email (subject + body) to all selected users. Useful for onboarding announcements, project invitations, or maintenance notices. The email backend is configured via Email service.
Delete selected users (PII-aware)
A wrapper around Django’s standard “delete selected” that masks personally identifying information on owned objects (resources, collections, classifications) instead of cascading the delete. Use this in preference to the bare delete when GDPR compliance matters.
Species & taxonomy (GBIF)
In v2 the Species table is sourced from the
GBIF Backbone Taxonomy (https://www.gbif.org/dataset/d7dddbf4-2cf0-4f39-9b2a-bb099caae36c)
instead of the older Catalogue of Life (CoL) export. The stable join key
is Species.taxon_id = gbifSpeciesKey — both the bundled CSVs
and the AI provider category mappings pivot around it.
What’s bundled
The Trapper Expert source ships gzipped CSV exports of the GBIF Backbone
under trapper/apps/extra_tables/taxonomy/:
gbif_<class>_<rank>.csv.gzper taxonomic class (mammalia, aves, amphibia, and the three reptile orders squamata / testudines / crocodylia — GBIF has no single Reptilia class) × rank (order, family, genus, species).gbif_mammalia_overrides.csv— manual corrections layered on top of the GBIF export (e.g. recently re-classified taxa, known GBIF bugs).get_taxonomy_gbif.py— the helper script used to regenerate the bundles.
Importing the taxonomy
The admin wizard runs this for you on a fresh deployment. To re-run later, use the management command:
# Inside the trapper container
python manage.py import_gbif_taxonomy --taxa mammalia --mode create
python manage.py import_gbif_taxonomy --taxa mammalia,aves,amphibia,reptilia
python manage.py import_gbif_taxonomy --taxa aves --mode update --dry-run
Modes:
create(default) — only insert species that don’t already exist (matched bytaxon_id).update— also overwrite name / rank / parent fields on existing rows from the bundle.--dry-run— print what would happen, don’t write.
The command is idempotent. Running it twice does not duplicate rows.
The same flow is exposed from the admin via an Import GBIF Taxonomy
button on the Species changelist (/admin/extra_tables/species/):

The Species changelist (shown here pre-import).
Todo
Replace species_admin.png and add a screenshot of the new
Import GBIF Taxonomy form.
Adding overrides for individual species
When the bundled GBIF export is wrong or out of date for a specific taxon, append a manual override:
# Append entries for two species, reading their canonical info from GBIF API
python manage.py add_gbif_override mammalia "Lynx lynx,Capreolus capreolus"
The command queries the GBIF API for each name, picks the highest-
confidence match, and appends the row to gbif_mammalia_overrides.csv
(or the analogous file for the chosen taxon). Re-run
import_gbif_taxonomy afterwards with --mode update to apply the
override to your DB.
Why this matters for AI providers
Each AI Provider carries a
categories JSON copied from trapper-schemas in Camtrap-DP
format. Each species AttributeLabel in that JSON has a
gbifSpeciesKey. The sync_ai_models command (run automatically
by the admin wizard) resolves each gbifSpeciesKey to a local
Species.taxon_id and writes the resulting PK as speciesId in
the same JSON. This is how AI predictions get linked to local Species
rows. Don’t hand-edit ``speciesId`` — it’s computed.
AI Providers
An AI Provider (/admin/media_classification/aiprovider/) is a
registered AI model that Trapper Expert can submit jobs to. There are
two concrete subclasses (django-polymorphic):
TrapperAIProvider — backed by a Trapper AI Manager instance (most common). Carries a
connectionFK to an AIProviderConnection.ExternalAIProvider — backed by a non-Trapper / external AI service. Reserved for future integrations.
What an AI Provider holds
Key fields you’ll see / set in the admin:
Field |
Meaning |
|---|---|
|
Human-readable identifier. |
|
|
|
Model accepts video resources. |
|
Model emits bounding boxes (vs. image-level classification). |
|
Classifier expects pre-cropped detections. |
|
The AI Manager’s |
|
SHA-256 — used to re-match across AI Manager re-registrations. |
|
Camtrap-DP-format mapping — AI label →
(species name, gbifSpeciesKey, speciesId).
Authoritative source: |
|
Auto-managed by the sync process. |
|
When |
|
Last successful sync timestamp. |
|
Auth token Expert uses on callback URLs from the AI Manager. |
Bootstrapping providers from the AI Manager
The admin wizard’s Step 5 does this once on a fresh deployment. The two underlying commands are:
# On the AI Manager — registers PredictionModel + AIRuntime rows
#   from the trapper-schemas manifest.
python manage.py sync_models_from_schemas

# On the Expert — pulls the AI Manager's catalog + bundled
#   trapper-schemas category YAMLs, creates / updates AIProvider
#   rows, and resolves gbifSpeciesKey → Species.taxon_id for each
#   species AttributeLabel. Idempotent.
python manage.py sync_ai_models
The full catalog of bundled models lives in
trapper-schemas/src/trapper_schemas/data/model_manifest.yaml and the
per-model species mappings under
trapper-schemas/src/trapper_schemas/data/categories/. To add a new
model: edit those files, cut a trapper-schemas release, bump the
pinned rev in trapper/, trapper-ai/, and trapper-ai-worker/
pyproject.toml, then re-run the two sync commands. See
trapper-schemas for the schema definitions and the AI Worker docs
for adding a new predictor class.
Manually creating an AI Provider in the admin
Most operators won’t need to do this — sync_ai_models covers the
canonical case. You’d reach for the manual flow when wiring up a brand-
new model not yet in trapper-schemas, or testing a one-off
configuration.
Navigate to Media Classification → AI Providers → Add → Trapper AI Provider.
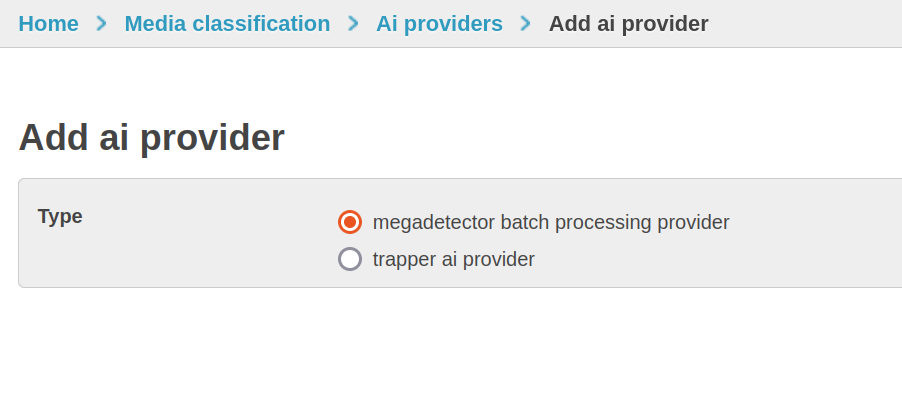
Pick Trapper AI Provider unless wiring up an external service.
Set the basic identification fields:
Name, Version, Description.
Provider type —
detectionfor MegaDetector-style models,classificationfor species classifiers,depthfor distance models.Connection — pick (or add) an AI Provider Connection pointing at your AI Manager (
api_url,api_auth_login,api_auth_passw,trapper_instance_url).Remote ID — the
PredictionModel.idUUID from the AI Manager.Model file hash — SHA-256 of the weights file (used to re- match if the AI Manager re-registers).
Configure capability flags:
Video support — only for models that accept video frames.
Object based — most modern detectors and classifiers; toggle off for whole-image classifiers.
Crop image — set on classifiers that operate on pre-cropped detections (DeepFaune, EfficientNet …).
Minimum confidence — predictions below this score are discarded server-side. Default
0.9.Skip empty — drop resources where the model returned no observations.
Skip missing labels — drop predictions whose label has no mapping in
categories.
Provide the categories JSON. The exact shape is documented in the
CategoryMappingPydantic model intrapper-schemas. A minimal detection mapping looks like:{ "attributes": [ { "type": "observationType", "labels": [ { "aiLabel": "1", "value": "animal" }, { "aiLabel": "2", "value": "human" }, { "aiLabel": "3", "value": "vehicle" } ] } ] }
A classification mapping carries the species join keys:
{
  "attributes": [
    {
      "type": "species",
      "labels": [
        {
          "aiLabel": "0",
          "scientificName": "Meles meles",
          "commonName": "European badger",
          "gbifSpeciesKey": 5219243
        },
        {
          "aiLabel": "3",
          "scientificName": "Cervus elaphus",
          "commonName": "Red deer",
          "gbifSpeciesKey": 2440954
        }
      ]
    }
  ]
}
On save,
sync_ai_modelsresolves eachgbifSpeciesKeyto a localSpeciesrow and writes the PK asspeciesIdon each label.Save. If you want to keep your manual edits to
categoriesfrom being overwritten on the next sync, untick Keep synced.
Two AI provider admin actions you should know about
Clone provider (clone_provider) — creates a copy of the selected
AI Provider with keep_synced=False. Use this to fork a synced
provider into an editable variant when you want to override the species
mapping or thresholds without losing the synced original.
Create classificator from species mapping
(create_classificator_from_species_mapping) — generates a
Classificator (the project-level field schema for classifications)
from the species AttributeLabels in this provider’s categories JSON.
The resulting Classificator has species pre-populated with the rows
the provider can predict, ready to be attached to a Classification
Project. Saves a lot of manual species-list curation.
Classification project administration
Classification Projects (/admin/media_classification/classificationproject/)
sit on top of Research Projects and host the actual annotation
workflows. Most of the AI configuration is on this model.
The fields cluster around four concerns:
AI model selection. object_detection_ai_model and
species_ai_model (both FK → AIProvider). When set, the project
runs the AI pipeline automatically on newly uploaded resources; see
Automatic AI Pipeline Workflow.
Pipeline behaviour.
required_ai— block annotators from working on a resource until the AI has run.copy_ai_classifications— automatically clone each AI Classification into an editable USER Classification when a user starts annotating.species_matching_iou_threshold— IoU between species classifier output and detector boxes for matching (default 0.5).
Confidence warnings.
observation_type_confidence_warning_thresholdspecies_confidence_warning_threshold
These do not block predictions; they just colour the UI to flag low-confidence rows for the annotator.
Privacy / blurring.
blur_humans/blur_vehicles— the AI pipeline runs the blur task automatically once a detection is approved.blur_backup— keep an unblurred copy underprotected/storage/.../backup/.blur_humans_and_vehicles_immediately— apply blur as soon as the AI pipeline finishes, without waiting for human approval. Irreversible unlessblur_backupis on.
Video & frame handling.
video_support_enabled— accept video resources at all.target_fps— the AI Worker downsamples to this rate before inference. Leaving it empty uses the source FPS, which can be expensive.
Visibility filters (mostly for the citizen science frontend).
exclude_humans/exclude_blankhide_classification_attributes_for_non_animals
Re-running the AI pipeline
When you change AI provider configuration or want to re-run inference
on existing data, use the changelist action on
Classification Project Collections
(/admin/media_classification/classificationprojectcollection/):
Rerun AI pipeline (rerun_ai_pipeline) — re-submits the resources
in each selected (project × collection) pair to the AI Manager,
overwriting existing AI Classifications. Approved USER Classifications
are not touched. Use sparingly on large collections — re-inference can
take hours per thousand videos.
Data packages (Camtrap DP export & publishing)
TRAPPER ships with a built-in exporter that produces Camera Trap Data
Package (Camtrap DP) archives from a Classification Project. Camtrap
DP is the community-developed TDWG-endorsed exchange format for camera
trap data — a Frictionless Data Package containing three required
tabular resources (deployments, media, observations) plus a
datapackage.json descriptor.
Standard homepage: https://camtrap-dp.tdwg.org/
Specification: https://camtrap-dp.tdwg.org/0.1/ (and successors)
Bundled spec inside this workspace:
camtrap-dp/(sibling repo).
Trapper’s ResultsDataPackageGenerator uses the
camtrap-package Python
library and frictionless[parquet] under the hood. Output archives
are valid Camtrap DP packages and can be ingested by any tool that
understands the standard (camtraptor in R, camtrap-dp.py, GBIF, …).
What gets exported
A generated package is a single .zip archive with the following
contents:
<package-name>.zip
├── datapackage.json        Frictionless descriptor + Camtrap DP metadata
├── deployments.csv.gz      One row per Deployment (or .parquet)
├── media.csv.gz            One row per Resource (or .parquet)
└── observations.csv.gz     One row per ClassificationDynamicAttrs
                            (or per event when aggregation is on; or .parquet)
The exporter pulls data from the live database via
polars, hands it to CamTrapPackage for
schema-aligned serialization, and writes the ZIP. CSV+gzip is the
default; Parquet is offered for analytic workloads.
The UserDataPackage model
Each generated archive is recorded in the
UserDataPackage model (/admin/accounts/userdatapackage/) with:
Field |
Meaning |
|---|---|
|
Generator / owner. |
|
The source ClassificationProject. |
|
The ZIP archive. Stored under the user’s media area; can also live in cloud storage. |
|
|
|
|
|
MD5 hash of the export parameters; used to short-circuit re-runs with identical params. |
|
Token used in shareable download URLs
( |
|
When the run finished. |
|
Free text, surfaces on the dashboard. |
Two package-type semantics matter:
Cache (``X``) — every export run writes one of these. If a subsequent run hits the same
cache_key, the cached package is returned without regenerating, which makes large project exports cheap to re-download.Released (``C``, ``released=True``) — when you tick Release in the export form, the resulting package is marked as canonical, excluded from cache invalidation, and shown to project members on the project page (not just the generating user’s dashboard).
Mini tutorial: exporting a Camtrap DP package
The full export form lives at Classification project page → Export results. As a project owner / manager:
Open the Classification Project’s detail page in the Trapper Expert UI.
Click Export classifications. The export form loads.
Todo
Add a screenshot of the Classification project export form showing the Camtrap DP option, format pickers, and privacy controls.
Set the package metadata:
Name — slug-safe identifier (regex:
^([-a-z0-9._/])+$). E.g.bialowieza-2025-summer.Title — human-readable, e.g. “Białowieża 2025 summer camera-trap data”.
Version — semver string; default
1.0.Keywords — free-form tags.
Licenses — pick from the Licence registry. If you don’t pick one, the exporter defaults to a private licence on the
dataandmediascopes (so the package isn’t accidentally publicised).
Choose the format:
Export format —
camtrapdp(recommended) ortrapper(internal — only useful for round-trip imports back into Trapper). Usecamtrapdp.File type —
csv.gz(universal, default) orparquet(smaller, faster for analytics, requiresfrictionless[parquet]on the consumer side).
Configure filtering:
Approved only — include only Classifications with
is_approved=True. DefaultTrue; turn off only for archival exports of in-progress work.Exclude blank — drop
observation_type=blankrows.All deployments — when off, only deployments that have at least one matching observation are exported.
Filter deployments — substring match against
Deployment.deployment_id. Useful for “give me one camera’s data”.
Configure events (Camtrap-DP-specific aggregation):
Include events — when on, observations are aggregated into event-level rows (one row per detected ecological event rather than per per-frame detection).
Count variable —
count(raw count per observation) orcountNew(newly seen individuals only — for individual-identification projects).
Configure privacy / redaction:
Mark media with humans as private — strips media URLs and bounding boxes for resources where the AI / annotators detected a human.
Mark media with vehicles as private — same, for vehicles.
Private species — multi-select of
Speciesrows whose locations should be redacted (e.g. sensitive predator dens). The species observations themselves stay; the precise locations are coarsened.URLs with token — when on, media URLs are signed with a download token so external readers without Trapper accounts can still access referenced files.
Release — tick to mark the resulting archive as the canonical publishable copy. Untick for working / cached exports.
Submit. The export runs as a Celery task (
celery_results_to_data_package); progress shows on the dashboard. Watch the Data packages panel of your dashboard (/dashboard/) for the row to appear, then download with the icon in the Actions column.
Generated archives obey the cache: re-submitting the form with identical parameters returns the cached package immediately. To force a fresh generation, change any parameter (e.g. bump the version) or tick Clear cache if available.
Publishing to external data hubs
Once you’ve generated a released package, push it to a public data hub. Trapper supports two backends out of the box:
Dataverse — the open-source data-repository platform used by Harvard, GBIF nodes, and many institutional repositories.
Zenodo — the CERN-hosted research-output repository.
The form lives at Dashboard → Data packages → Publish data package:
Pick the source
UserDataPackage(must bereleased=True).Choose Data hub:
DataverseorZenodo.Fill in the connection details:
Host URL — the hub’s base URL (e.g.
https://dataverse.example.eduorhttps://zenodo.org).API token — generated in the hub’s user-profile page.
Container — for Dataverse only: the dataset / collection ID to publish into.
Secure connection — leave on; turn off only against an internal hub with self-signed TLS.
Submit. The Celery task
celery_publish_data_packageparsesdatapackage.json, maps the descriptor throughcamtrap_package.mapper.package2dataverse/package2zenodo, and uploads the files + metadata via the hub’s REST API. On success, the dashboard shows the public URL.
Caveats:
Tokens are stored in the form submission only, not in the database. The publish task fails if the token doesn’t have write access; check the hub’s per-token scope.
For Dataverse, the target dataset must already exist and be in draft state. The task uploads files into the draft; you publish the draft from the Dataverse UI.
Zenodo charges no fees but creates DOIs that are immutable — be sure of the package contents before publishing.
Managing existing packages
Two surfaces let you inspect and manage generated packages:
User dashboard. /dashboard/ — Data packages panel. Lists the
current user’s released and working packages with Filename,
Type, Size, Created, Download, Delete. The cached
packages are hidden (CLASSIFICATION_RESULTS_CACHE type filtered
out).
Admin view. /admin/accounts/userdatapackage/ — read-only
listing for site admins. Every package on the instance is shown; you
can filter by package_type, project, user, released.
Each row exposes a download link in a new tab. Useful for:
Debugging “why is this user out of disk quota” (sum the package sizes for that user).
Auditing which projects have released packages.
Manually deleting stale cache rows (
package_type=CLASSIFICATION_RESULTS_CACHE, older than N days).
Public sharing without an account
The download URL /data-package/<pk>/ accepts a ?rt=<uuid4>
query token equal to the package’s uuid4 field. With this token
appended, anyone can download the archive without logging in. Use the
Get download URL action on the dashboard to copy a token-bearing
URL onto your clipboard, then share it with collaborators.
Untokened URLs require the user to be either the package owner or a superuser; everyone else gets 404.
REST API
Trapper exposes one REST endpoint for programmatic data-package generation. Listing and downloading happen through the existing sendfile / dashboard URLs (no list endpoint — pull from the admin queryset if you need one).
Generate / fetch package
Endpoint:
GET /api/package/{project_pk}/Auth: Standard DRF authentication (Session, OAuth2, or token — whichever is configured on your instance).
Permission: the requesting user must have
can_view_classificationson the target Classification Project.
Query parameters mirror the export form’s
ResultsDataPackageGeneratorParams:
Parameter |
Effect |
Default |
|---|---|---|
|
|
|
|
|
|
|
|
|
|
|
|
|
|
|
|
substring of |
(empty) |
|
|
|
|
|
|
|
|
|
|
|
|
|
comma-separated |
(empty) |
|
sign media URLs |
|
|
mark generated package released |
|
|
bypass cached package match |
|
|
return latest released package for this project (skips generation entirely) |
|
|
package metadata (see export form for details) |
various |
Response shape:
{
  "data": {
    "message": "Data package created.",
    "errors": null,
    "package": "https://trapper.example.org/data-package/12345/?rt=8e5d…"
  }
}
The package URL is a token-bearing download link — usable
directly without re-authenticating. message will be
"Package available in cache..." when the cache short-circuited the
generation.
Example: programmatic export
# 1. Authenticate (token authentication shown; session and OAuth2
#    also work)
TOKEN="$(curl -s -X POST https://trapper.example.org/api/token/ \
  -d 'username=alice' -d 'password=secret' | jq -r .token)"

# 2. Generate (or reuse cache) a Camtrap DP export of project 7
#    in Parquet, with humans + vehicles redacted, no events:
curl -s -G "https://trapper.example.org/api/package/7/" \
  -H "Authorization: Token $TOKEN" \
  --data-urlencode "export_format=camtrapdp" \
  --data-urlencode "export_filetype=parquet" \
  --data-urlencode "approved_only=true" \
  --data-urlencode "include_events=false" \
  --data-urlencode "private_human=true" \
  --data-urlencode "private_vehicle=true" \
  --data-urlencode "name=bialowieza-2025-summer" \
  --data-urlencode "version=1.0" \
  --data-urlencode "title=Białowieża 2025 summer"

# 3. Pull the URL out and download:
URL="$(curl -s -G "https://trapper.example.org/api/package/7/" \
         -H "Authorization: Token $TOKEN" | jq -r .data.package)"
curl -OJL "$URL"
Example: fetch the latest released package only
When you only want to download the canonical release without generating anything new:
curl -s -G "https://trapper.example.org/api/package/7/" \
  -H "Authorization: Token $TOKEN" \
  --data-urlencode "get_released=true" \
  | jq -r .data.package \
  | xargs curl -OJL
Returns 404 if the project has no released packages yet.
Example: Python
import requests

BASE = "https://trapper.example.org"
TOKEN = "..."

resp = requests.get(
    f"{BASE}/api/package/7/",
    headers={"Authorization": f"Token {TOKEN}"},
    params={
        "export_format": "camtrapdp",
        "export_filetype": "csv.gz",
        "approved_only": "true",
        "private_human": "true",
        "name": "bialowieza-2025-summer",
        "version": "1.0",
        "title": "Białowieża 2025 summer",
    },
    timeout=600,    # generation can be slow on large projects
)
resp.raise_for_status()
download_url = resp.json()["data"]["package"]

archive = requests.get(download_url, stream=True)
archive.raise_for_status()
with open("package.zip", "wb") as fh:
    for chunk in archive.iter_content(chunk_size=2**20):
        fh.write(chunk)
The same flow works from R via httr2 or from any other HTTP
client. For analytic workflows, point camtraptor (R) or
camtrap-dp.py at the downloaded archive directly — they
understand the Camtrap DP format and abstract away the
deployments / media / observations joins.
Cross-references
Classification project administration — for AI configuration that feeds the observations exported here.
AI Providers — the
categoriesJSON on AI Providers is itself in Camtrap-DP format, sharing label semantics with the exported observations.camtrap-dp/(sibling repo) — the bundled copy of the standard including the JSON Schema and table schemas.Uploading data with Trapper Tools (end-to-end) — for the inverse direction: turning a raw camera-trap directory into a Camtrap DP-compatible upload via
trapper-tools.
Deployment administration
Deployments (/admin/geomap/deployment/) tie a camera-trap setup at
a Location to a time interval, capture method, feature type, and
view-quality flags. Beyond the standard CRUD operations, three
purpose-built admin actions cover the deployment-specific workflows
that don’t fit a regular form:
Distance calibration & estimation
Trapper Expert can estimate the distance from each detected object to the camera, frame by frame, by combining a depth-model prediction with a per-deployment calibration model. The pipeline has two phases:
Calibration. A calibration deployment — i.e. a Deployment flagged as
is_calibration=True— captures a few resources where you can mark reference points (typically targets at known distances from the camera). The calibration phase fits aCalibrationModel(linear or curve-knot scale/offset) that maps raw depth-model output to metres for that camera + lens.Estimation. Real deployments running the same camera + lens inherit (or reference) that calibration. The distance-estimation pipeline runs on each Resource: a depth model produces per-pixel depth, the calibration converts to metres, per-object SAM / Kalman / smoothing parameters integrate the distance over the track, and the median distance is written into
ClassificationDynamicAttrs.distance.
The full schema for the configuration is the
CalibrationConfig / CalibrationModel / DistanceEstimationConfig
Pydantic models in trapper-schemas (subpackage depth). The
admin form renders these as grouped fieldsets via
json_schema_extra.groups on the schema fields.
Re-running depth calibration (rerun_depth_calibration). Select
calibration deployments and run the action when:
you’ve added or edited reference points in the UI;
the depth-model AIProvider was updated;
the calibration parameters in the deployment form changed.
The action re-fits the CalibrationModel for each selected
deployment and saves the result back into the Deployment row.
Re-running distance estimation (rerun_distance_estimation).
Select non-calibration deployments. The action form lets you override
the ~20 distance-estimation parameters one-shot for the run:
Group |
Fields |
|---|---|
Frame sampling |
|
SAM (segmentation) |
|
Kalman filter |
|
Smoothing |
|
Calibration alignment |
|
Override values are not persisted on the Deployment itself — they apply only to this re-run. Persistent changes go through the regular Deployment edit form.
Todo
Add a screenshot of the Rerun distance estimation form showing the grouped fieldsets.
For a step-by-step calibration walkthrough — from creating the calibration deployment to setting reference points to running the estimation — see Distance calibration & estimation walkthrough.
Resource & Collection administration
``set_owner_managers_action`` on Resource (and via Collection
inline) — bulk-changes owner and managers on selected
Resources. Useful when a collaborator leaves the project and you need
to transfer everything they own.
``generate_missing_thumbnails_for_collections`` on Collection — fires
the async celery_update_thumbnails task for every Resource in the
selected collections that’s missing a thumbnail / preview. The same
task is also accessible globally via the
Generate missing thumbnails button on the Resource changelist (which
runs against all Resources, not a selection).
If you need finer control or scripted regeneration, use the generate_thumbnails management command instead.
AI classification job monitoring
Each AI run is recorded as an
AI Classification Job (/admin/media_classification/aiclassificationjob/)
with a UUID, a snapshot of the exact job_config JSON that was
submitted, and a link to the corresponding UserRemoteTask row that
tracks the remote AI Manager job’s lifecycle.
Two actions help when a job is stuck:
Update status (update_status) — re-fetches the latest remote
status from the AI Manager. Run this after restarting the AI Manager,
or when the Celery task that normally polls statuses has been killed.
Reparse results (reparse_results) — resets the job to the
fetch_results stage and retries the result-parsing path. Useful when
post-processing failed (e.g. a malformed categories mapping caused
the species resolution to crash) — fix the underlying issue, then
trigger this action to ingest the existing AI Manager result without
re-running inference.
Inspect the job’s job_config JSON to see exactly what was submitted:
the chosen minimum_confidence, skip_empty / skip_missing_labels
flags, the tracker selection, the depth configuration if applicable.
This is the single point of truth for “what did this run actually do?”
Admin actions reference
Every admin action in the Expert backend, grouped by app. Each row points at the action’s source so you can read it in detail.
accounts
Action |
What it does |
|---|---|
|
Assign Research / Classification project roles to selected users; optional activation. |
|
Create Pure-FTPd accounts for selected users. |
|
Remove Pure-FTPd access for selected users. |
|
Send a custom email to selected users. |
|
PII-aware delete; masks instead of cascading. |
common
Action |
What it does |
|---|---|
|
Clear all users’ GDPR consents. |
|
Clear all users’ Terms of Service consents. |
|
Clear both GDPR and ToS consents. |
storage
Action |
What it does |
|---|---|
|
Async thumbnails for Resources in the selected Collections. |
|
Bulk-change owner / managers on selected Resources. |
|
Same, but over all Resources. |
media_classification
Action |
What it does |
|---|---|
|
Re-submit AI inference jobs for the selected (project × collection) pairs. |
|
Generate a Classificator from this provider’s species mapping. |
|
Create an editable copy with |
|
Re-fetch remote AI Manager status. |
|
Reset to fetch_results and retry. |
geomap
Action |
What it does |
|---|---|
|
Cascade-delete deployment + descendants (Location preserved). |
|
Re-fit |
|
Re-run distance estimation on selected deployments with optional overrides. |
extra_tables
Action / view |
What it does |
|---|---|
|
Import / update Species rows from the bundled GBIF Backbone CSVs. |
Management commands reference
All commands run inside the trapper container:
docker exec -it trapper bash
python /app/trapper-project/manage.py <command> [args]
…or when using trapper-setup:
./admin.py manage trapper <command> -p <profile> -- [args]
Taxonomy
import_gbif_taxonomyImport species from the bundled GBIF Backbone CSVs. Idempotent.
python manage.py import_gbif_taxonomy --taxa mammalia,aves --mode create
python manage.py import_gbif_taxonomy --taxa mammalia --mode update --dry-run
Args:
--taxa(required) — comma-separated subset ofmammalia,aves,reptilia,amphibia.--mode—create(insert only) orupdate(overwrite existing rows bytaxon_id).--dry-run— print actions, don’t write.
add_gbif_overrideAppend manual taxonomy overrides by querying the GBIF API.
python manage.py add_gbif_override mammalia "Bison bonasus,Lynx lynx"
python manage.py add_gbif_override aves "Strix uralensis"
Args:
taxon(positional) — one of the bundled taxa.names(positional, comma-separated) — scientific names to look up.
The override CSV is
trapper/apps/extra_tables/taxonomy/gbif_<taxon>_overrides.csv.
AI / model sync
sync_ai_modelsPull the AI Manager’s prediction-model catalog + bundled
trapper-schemascategory YAMLs, create / update AIProvider rows, resolvegbifSpeciesKey→Species.taxon_idfor every species AttributeLabel. Idempotent.python manage.py sync_ai_models
Run this:
on a fresh deployment (the admin wizard does it once);
after upgrading the pinned
trapper-schemasrev;after the AI Manager re-registers a model (the SHA-256 model-file-hash is the join key, so re-registrations are tracked correctly).
Note
sync_ai_modelsdoes not download model weights. Weight caching is the AI Worker coordinator’s responsibility, driven bymodel_manifest.yamlintrapper-schemas.
Classifications
rebuild_frames_msgpackRegenerate the zstd-compressed msgpack files on disk (
Classification.frames_msgpack) from the per-frame data in theObjectFrameObservationhypertable. Use after a schema change or data backfill that affected the per-frame data.# Rebuild every AI classification across the instance python manage.py rebuild_frames_msgpack --ai --all # Rebuild every USER classification in project 7 python manage.py rebuild_frames_msgpack --user --project 7 # Multiple collections python manage.py rebuild_frames_msgpack --ai --collection 12 --collection 13
Args:
--ai/--user(mutually exclusive, required) — which classification type to process.--all— process every classification of that type.--project N— limit to ClassificationProjectN.--collection N(repeatable) — limit to ClassificationProjectCollection IDs.
Refuses to run when
USE_FRAMES_HYPERTABLEis off (because the command reads from the hypertable). See Frame-level data and USE_FRAMES_HYPERTABLE.
Hypertable
configure_hypertableInspect / tune the TimescaleDB hypertable backing the
ObjectFrameObservationtable. Safe to re-run; only applies changes that differ from the current state.# Read current config (status, dimensions, compression, chunk distribution) python manage.py configure_hypertable --show # Change the chunk interval for new chunks (existing chunks unchanged) python manage.py configure_hypertable --chunk-interval "30 days" # Replace the active compression policy python manage.py configure_hypertable --compress-after "60 days" # Re-tune segmentby for newly compressed chunks python manage.py configure_hypertable --compress-segmentby "project_id,classification_id" # Combine + dry-run python manage.py configure_hypertable \ --chunk-interval "30 days" \ --compress-after "14 days" \ --dry-run
See Frame-level data and USE_FRAMES_HYPERTABLE for the full background.
Data lifecycle
generate_thumbnailsGenerate / regenerate thumbnail and preview images for Resources. Multi-threaded; safe to run on a live system.
python manage.py generate_thumbnails --all
python manage.py generate_thumbnails --missing both --threads 8
python manage.py generate_thumbnails --filter "project_id=7" --dry-run
Args:
--all— process every resource.--missing(thumbnails|previews|both) — only act on resources missing the chosen output(s).--threads N— worker pool size.--filter— Django queryset filter expression.--dry-run.
extract_metadataExtract / parse media metadata (EXIF, container timestamps) for uploaded resources. Often the first remediation step when a batch of files came in without correct timestamps.
python manage.py extract_metadata --projects 7 --run --parse-timestamps
python manage.py extract_metadata --videos-only --max-workers 4
python manage.py extract_metadata --filter "deployment_id=42" --update-deployment
Args of note:
--projects N(repeatable) — limit to research project IDs.--run— actually do the extraction (default is dry-run).--parse-timestamps— also parse EXIF / video timestamps.--update-deployment— sync each Resource’sdate_recordedback into its Deployment timeline if needed.--images-only/--videos-only— restrict by media type.--max-workers,--filter.
delete_orphanedFind and delete media files on disk that aren’t referenced by any Resource row. Use after manually deleting Resources or recovering from a partial restore.
python manage.py delete_orphaned --info     # dry-run report
python manage.py delete_orphaned            # actually delete
Server
start_uploader_serverStart the chunked-HTTP-upload FastAPI service (the Compose
trapper_uploadercontainer runs this). Listens on0.0.0.0:8088by default. You’d only run this manually when developing the uploader code outside Compose.python manage.py start_uploader_server