Bounding boxes for ML training data
At a glance
Draw bounding boxes around animals, humans, or vehicles in a classification, to produce training data for ML object-detection models.
- Time: a few minutes per resource
- Who: annotators producing training data
- Prerequisites: a classified resource
Choosing an interface
There's only one place to draw bounding boxes — the Citizen Science frontend. (There's no separate "Expert" classification UI: the Django admin has no draw-on-image tooling at all.) Two routes get you to the same drawing view, depending on where you're starting from:
- Navigate to your project, open Classification view in the left sidebar.
- Pick the deployment you want to work on from the Deployment filter.
- Click a thumbnail's Classify link.
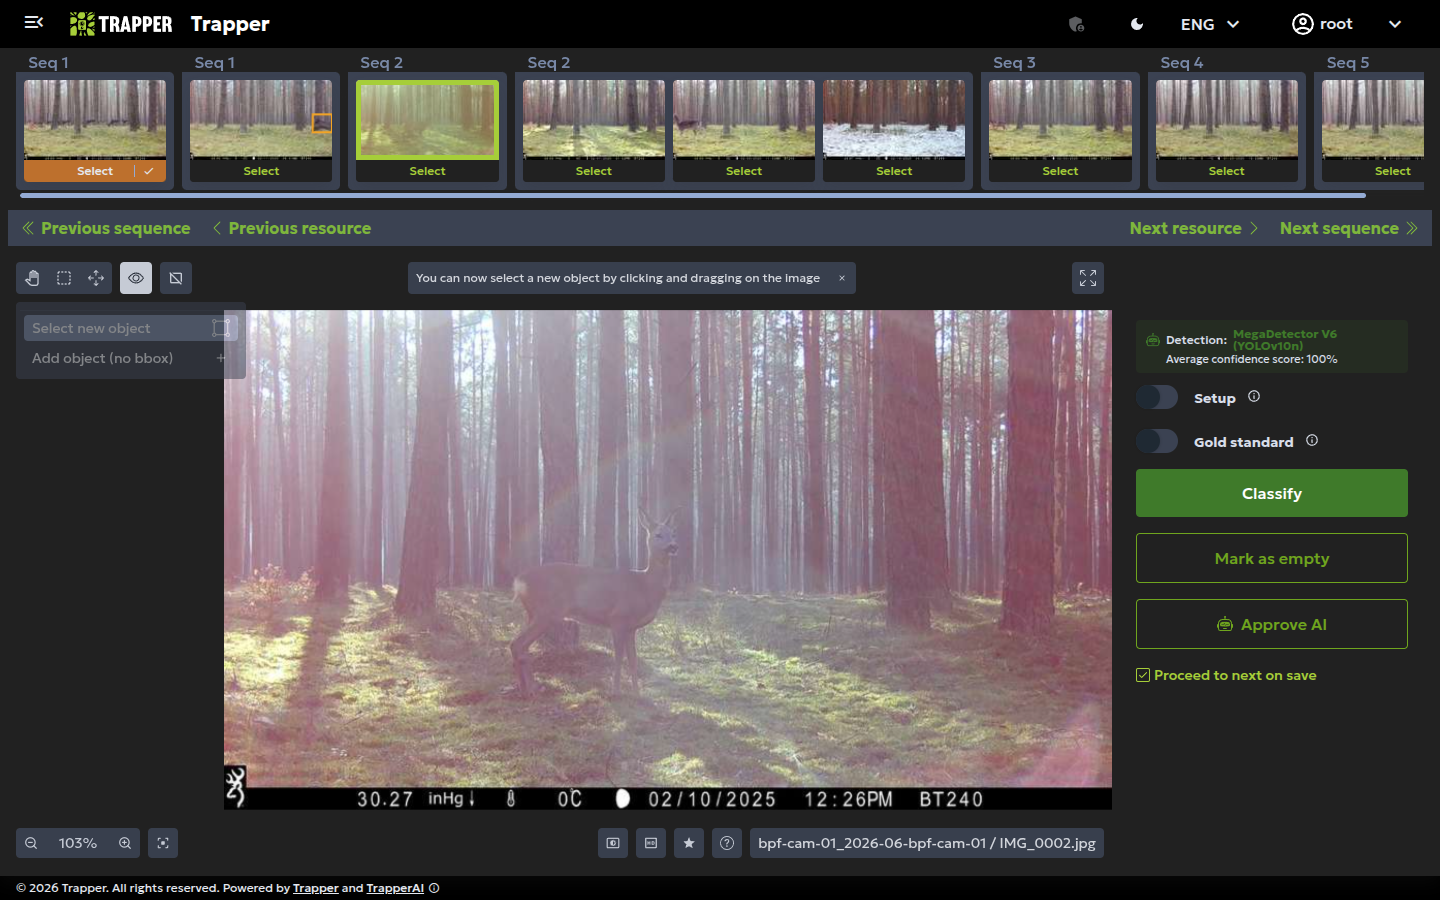
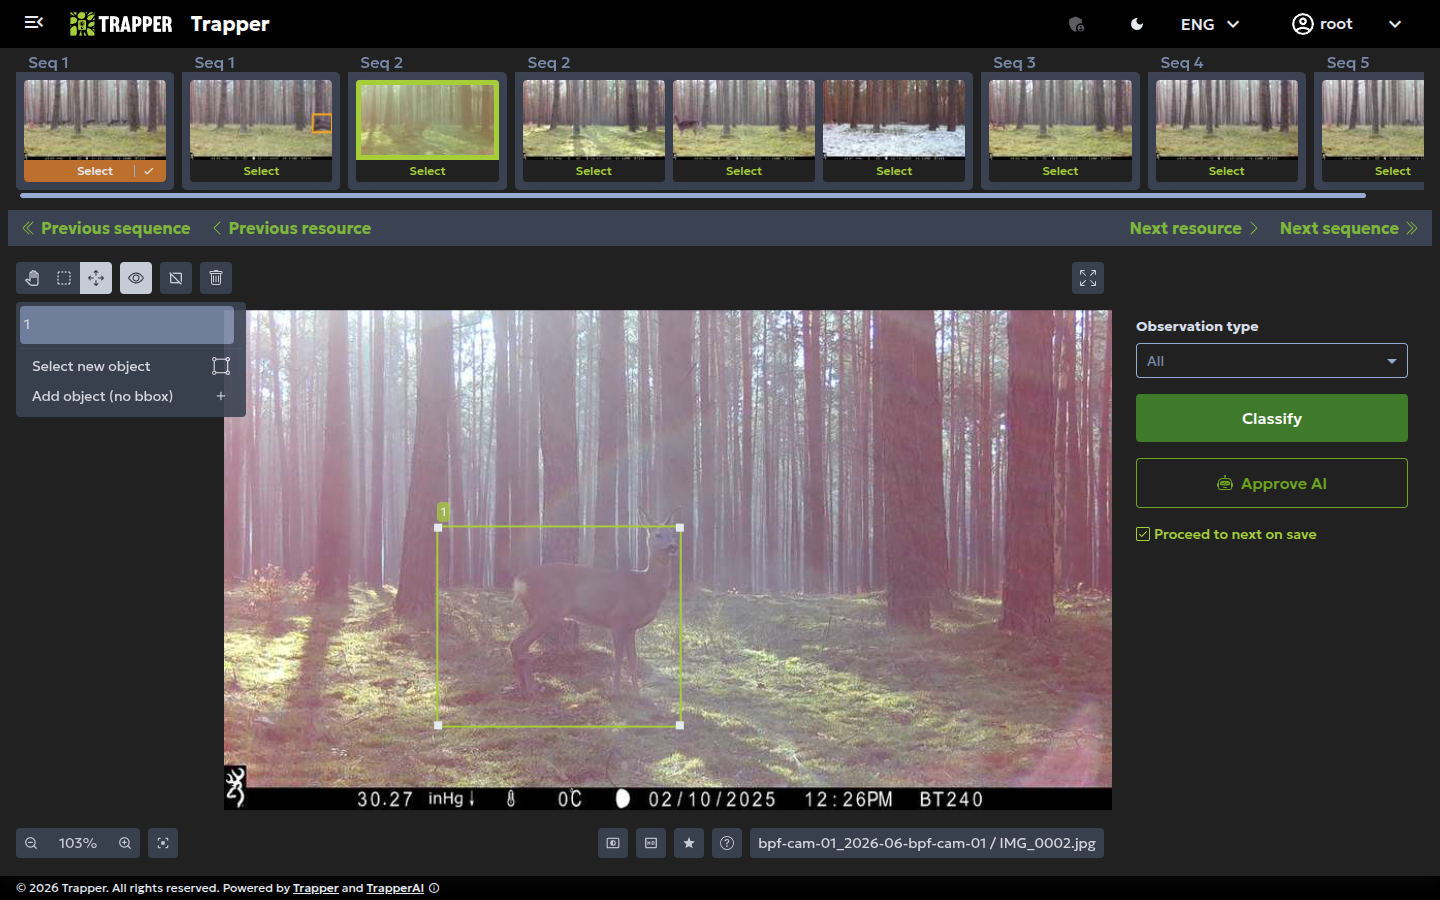
- Draw bounding boxes by clicking and dragging on the image, after Select new object.
- Associate each bounding box with the appropriate classification attributes, then click Classify to save.
Useful when you found the resource via Media (filtering/searching) rather than by deployment.
-
On the Media list, click the preview icon on a row to open its detail view.
-
Click the icon tooltipped "Classify image" (next to the AI/user classification tables) to open the drawing interface.
-
Click Select new object, draw a box around the object as tightly as possible, then specify which dynamic attribute field it links to.
-
Click Classify to save.
Verify it worked
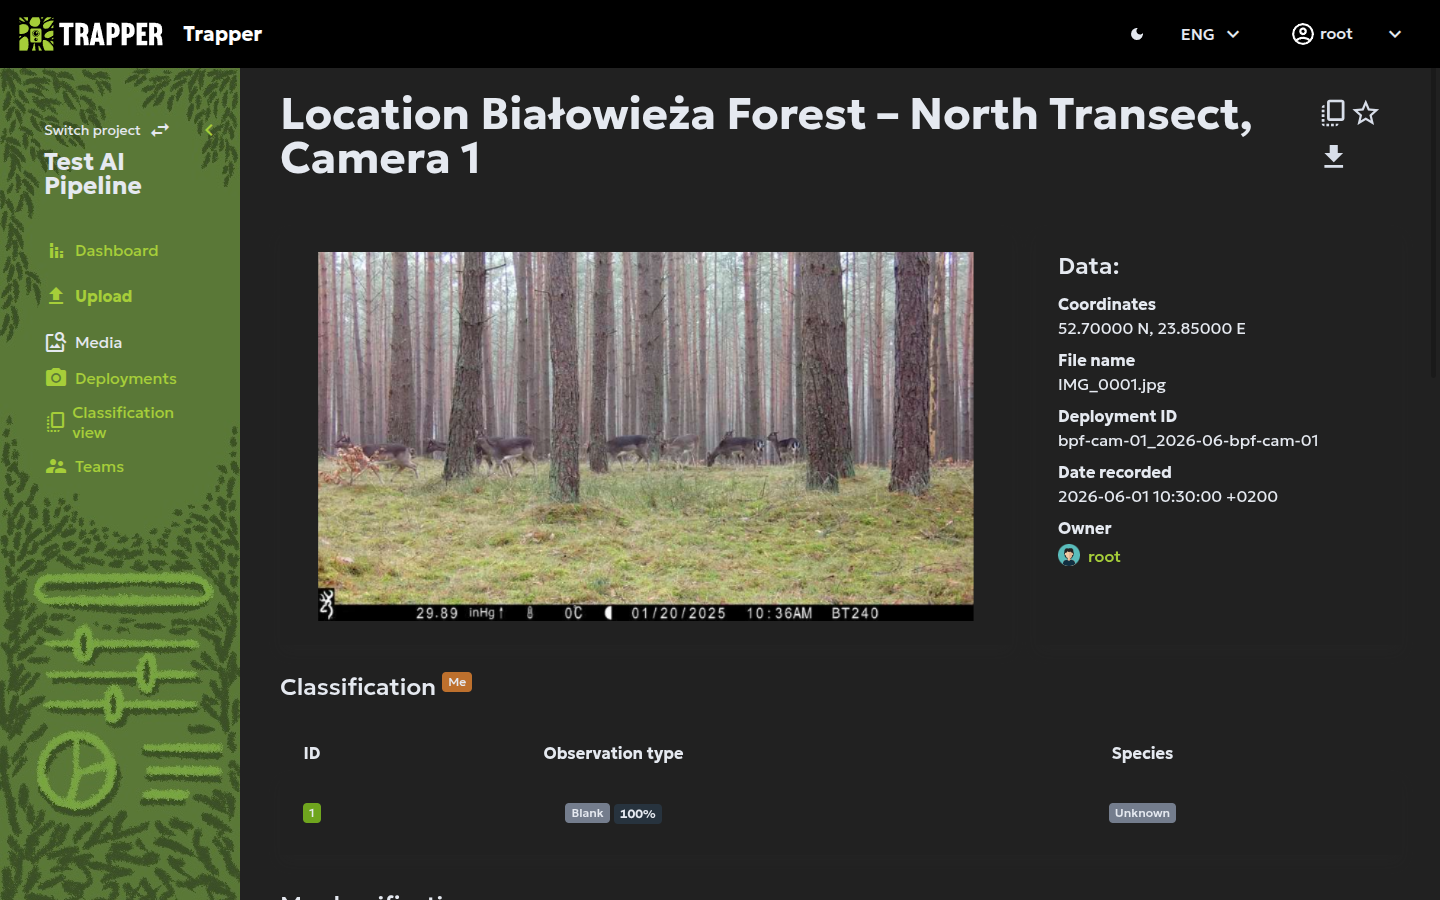
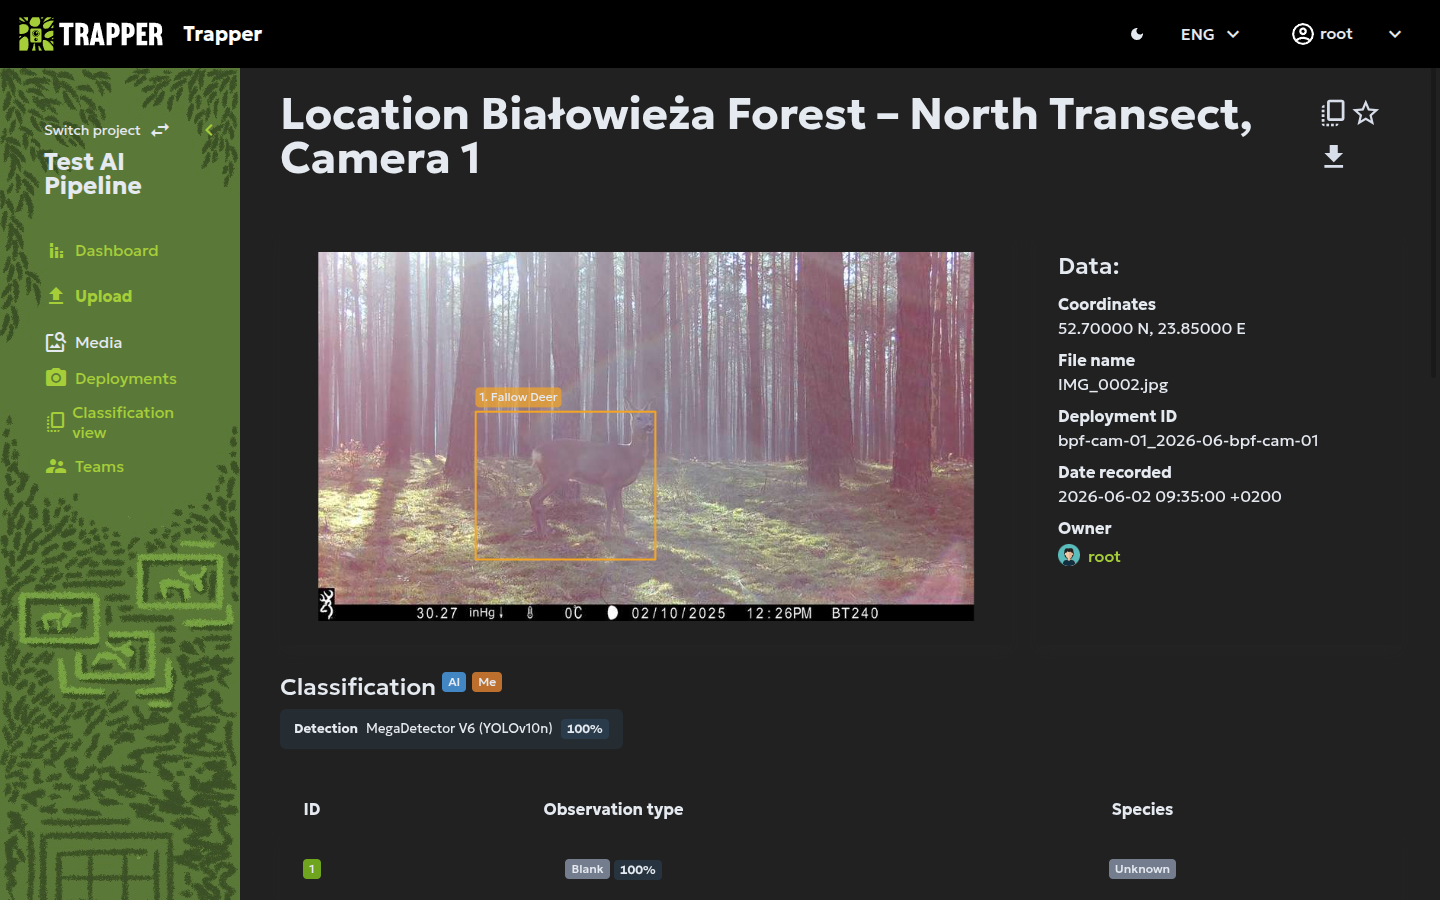
Saved bounding boxes appear overlaid on the resource in the classification screen, linked to their classification attribute.
Next steps
- Video annotation & interpolation — for drawing boxes across video frames efficiently