Your first research project
At a glance
Go from an empty TRAPPER instance to your first classified camera-trap resource: create a research project, add locations and deployments, upload resources, build a Classificator, and classify and approve a resource.
- Time: ~30 minutes (excluding upload time for your own data)
- Who: anyone starting a new project in TRAPPER
- Prerequisites: a running TRAPPER instance with an activated account
Before you begin
- You have an activated TRAPPER account (registered + approved by an admin)
- You have some camera-trap images or videos ready to upload, organized by deployment
-
trapper-toolsis installed and configured (trapper-tools config init+ server URL/credentials) — steps 3 and 4 use it. See Before the tutorials: prerequisites; you can fill in theproject_idafter step 1 creates the project. - You know the two places you'll be working in: the Expert admin (
http://localhost:8000/admin/on a localhost stack — where projects, deployments and classification setup live) and the Citizen Science frontend (a separate app, usually on its own URL/port — see Citizen Science: first observations for how to log into it), where the actual classifying happens. The tutorial tells you when to switch between them.
Steps
1. Create a research project
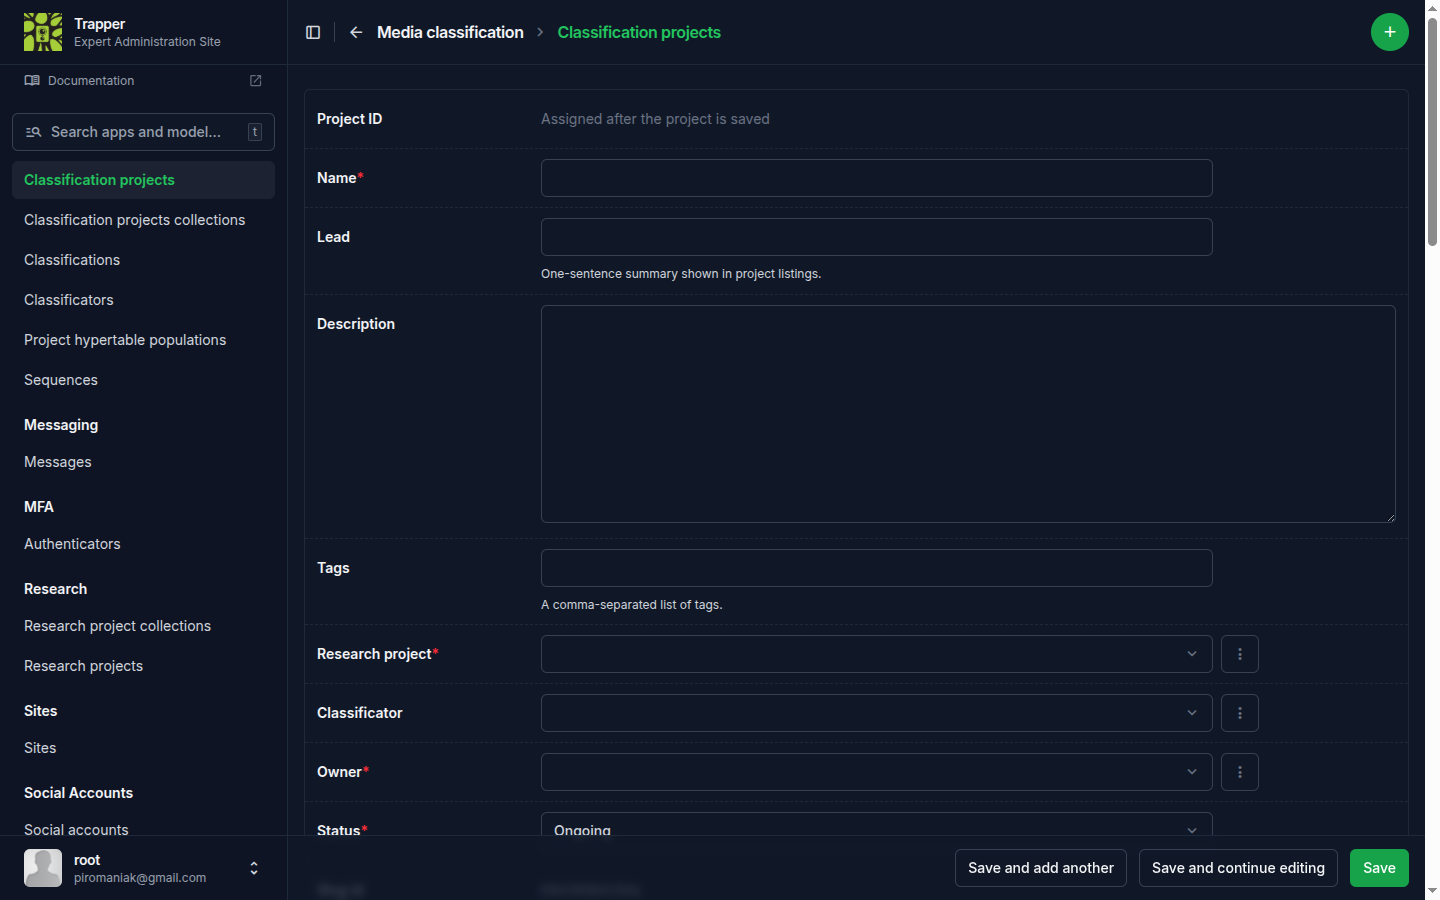
In the left sidebar, open Research → Research projects, then click the + icon in the top right of the list page. This opens the Add research project form.
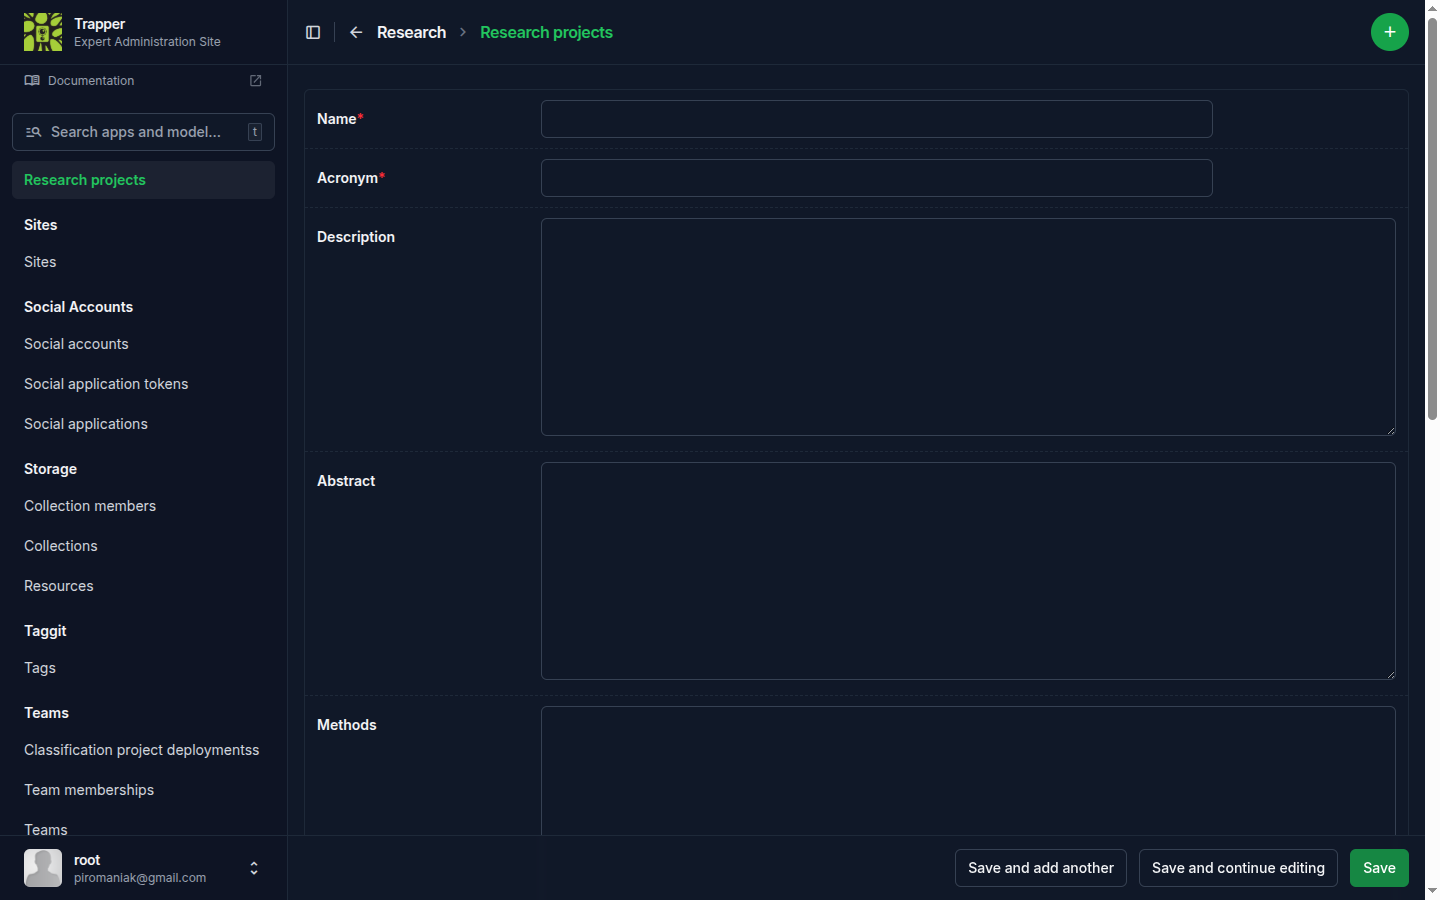
Fill in the form and click Save. The fields that matter most for a first project:
| Field | What it does | Recommended value |
|---|---|---|
| Name* | Full project name. | Anything descriptive — it must be unique. |
| Acronym* | Short identifier, used in auto-fill elsewhere in TRAPPER. | Up to 10 characters (it's a hard limit), unique. |
| Sampling design* | How locations were chosen — a Camtrap DP field (simpleRandom, systematicRandom, clusteredRandom, experimental, targeted, opportunistic). |
Whatever matches your actual study design — opportunistic if you're just trying TRAPPER out. |
| Sensor method* | What triggers the camera (activityDetection, timeLapse, or both). |
Match your hardware; activityDetection for most motion-triggered camera traps. |
| Animal types* | Whether the study tracks unmarked, marked, or both kinds of animals. | unmarked unless you're doing individual-recognition work. |
| Bait use* | Whether/how bait was used (none, scent, food, visual, acoustic, other). |
none for a typical unbaited camera-trap survey. |
| Event interval* | Minutes that must pass between two detections at the same deployment before they count as separate events. | 30 is a common default; you can change it later. |
| Owner* | The project's responsible user. | Yourself. |
| Status* | Not yet processed / Rejected / Approved. Leave as-is — see the note below. |
— |
| Is Citizen Science research project? | Whether the project's media classification work happens in the Citizen Science frontend. | Check it — this tutorial uses the Citizen Science frontend in step 8. |
Description, Abstract, Methods and Tags are optional free text. There are also two inline tables at the bottom of the form (Research project roles, Research project collections) — you can leave both empty for now and come back to them later.
Note
Right after adding your research project, you'll see a notification that it needs to be activated by an admin — your request lands in the Admin dashboard for manual approval. This is a deliberate control on the amount and content of projects in your institution/team. If you're an admin yourself, approve it by setting Status to Approved on the project's edit page.
Once approved, the project appears under Research → Research projects, listing Name, Acronym, Keywords and your role. You can filter the list or search it.
2. Add locations
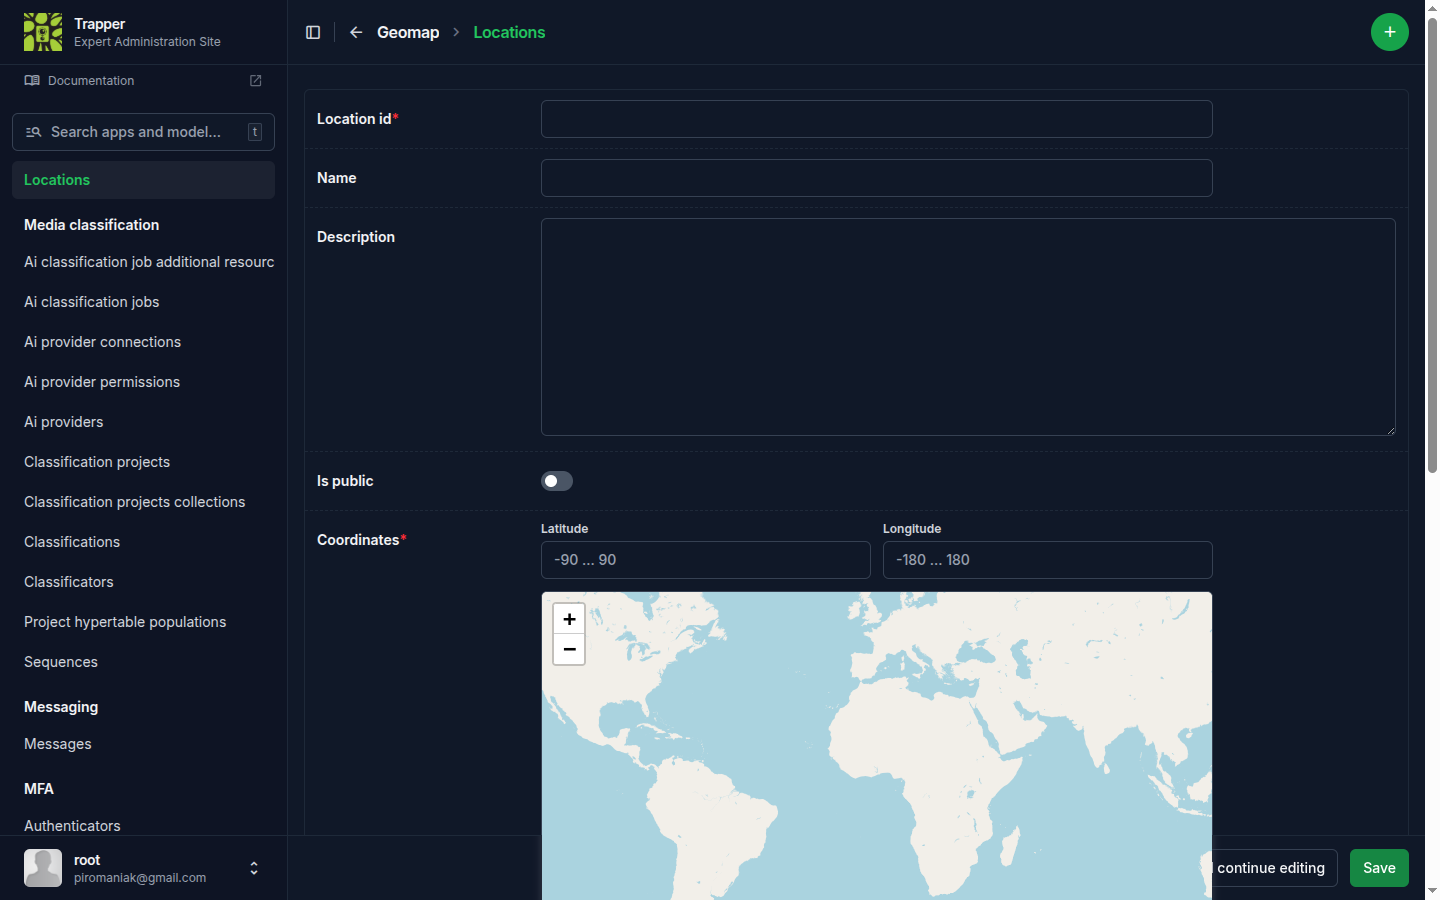
Two ways to add Locations: manually, or via file upload. Both live under Geomap → Locations in the sidebar.
Manually: open Geomap → Locations, click the + icon, then place the point on the map view.
Bulk via CSV or GPX (recommended for more than a couple of locations): a comma-separated .csv (gzipped .csv.gz is also accepted) with columns:
| Column | Meaning |
|---|---|
locationID |
The ID/name of the location |
longitude |
WGS84 decimal degrees, e.g. 19.58536776 |
latitude |
WGS84 decimal degrees, e.g. 63.55417296 |
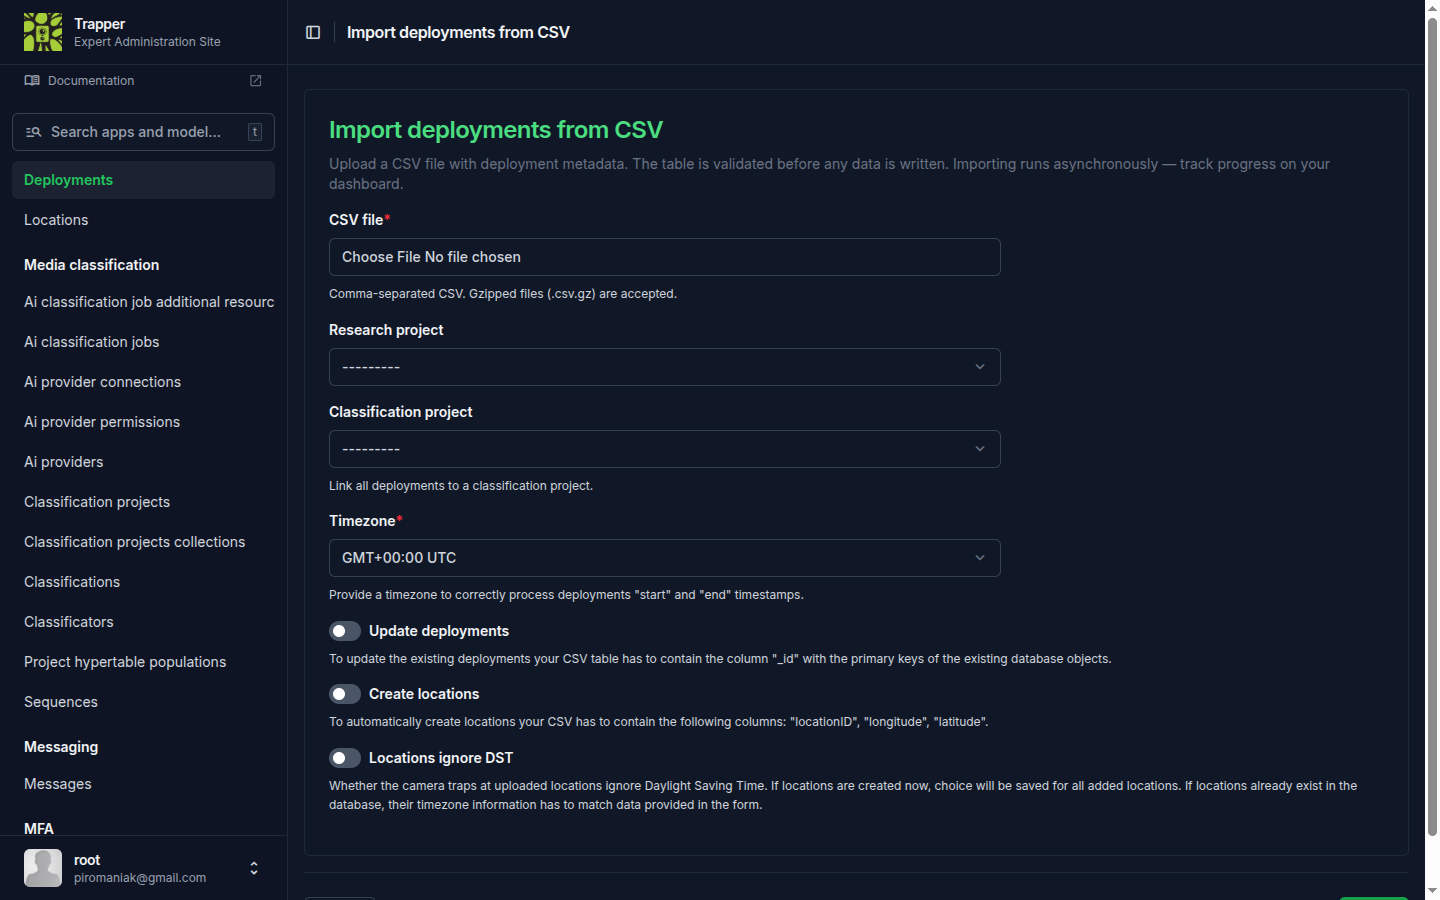
From the Locations list, click Import locations from CSV/GPX (next to the + icon), pick your file, the target Research project, and the timezone to apply to every imported location (there's also an Ignore DST checkbox for cameras that don't observe daylight saving time). See Import locations & deployments for the full timezone/DST rules.

3. Add deployments
A Deployment adds a start/end time to a Location — one camera-out-to-pickup session, or a session between battery/card changes. Manually adding deployments is error-prone; instead, generate the deployments table from the media files themselves with trapper-tools:
trapper-tools helpers template --data-path /path/to/data
(This command is local-only — it works even before you've configured a server connection.) It analyzes your media and writes a CSV with the deployment metadata. Import it from Geomap → Deployments, using the Import deployments from CSV button next to the list's + icon.
Tip
TRAPPER can create the Location rows during the same import, letting you skip step 2 entirely: tick Create locations in the import form and make sure the CSV contains locationID, longitude, and latitude columns (the generated template doesn't include coordinates — add the two columns yourself).
4. Upload resources
See Convert, package & upload with Trapper-Tools for the full ingestion workflow. The short version:
trapper-tools pipeline --data-path /path/to/data --convert --trigger
This needs the configured server connection from the prerequisites (with project_id set to the project from step 1 — check with trapper-tools helpers test-connection). It converts media, packages it, and uploads via the resumable HTTP chunk uploader. Each top-level directory under your data path becomes a TRAPPER Collection (named after the directory) — that's the Collection you'll attach to the classification project in step 7; nothing needs to be created by hand. The --trigger flag starts the AI pipeline automatically, but only once a Classification Project with an AI configuration exists (you create one in step 6) — on this first pass it has nothing to trigger yet, which is fine.
5. Build a Classificator
A Classificator describes the set of attributes annotators fill in — species, observation type, count, and so on. Open Media classification → Classificators and click the + icon.
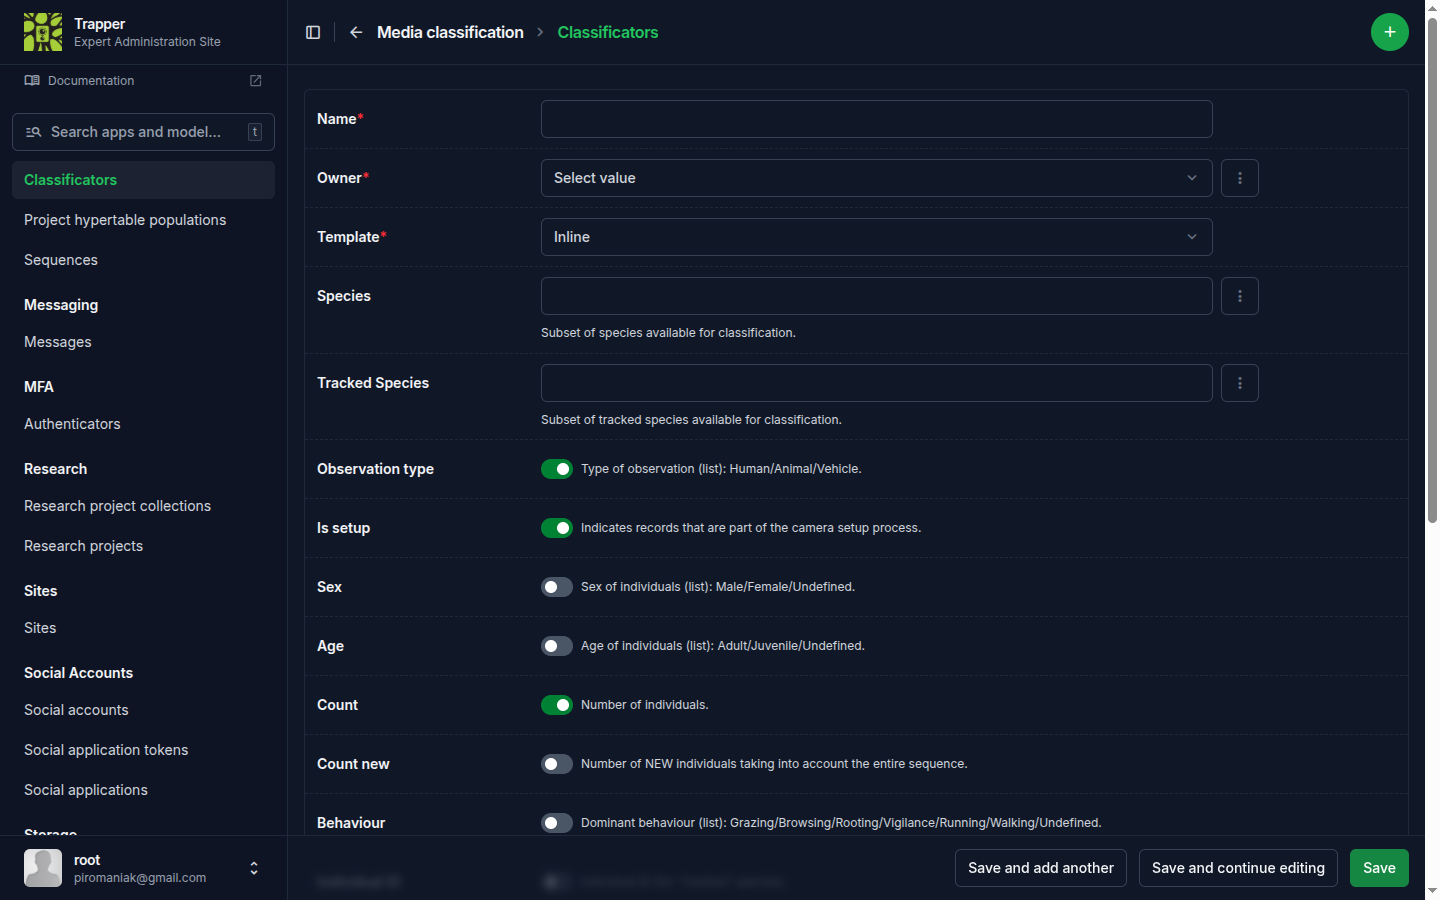
Check the pre-defined attributes you need, or add custom ones in the custom attribute form.
Group-level annotations
Enabling this lets experts record an aggregate group observation (species, sex, age, group-size count) without drawing a bounding box per individual — useful for herds/flocks where per-object boxes are impractical. Per-object and group-level rows can coexist on the same resource.
6. Create a classification project
Open Media classification → Classification projects and click the + icon. Set the name, the parent Research Project, the Classificator from step 5, an optional default AI Provider, and the users involved.
For the full field reference (AI models, privacy/blurring, confidence thresholds), see Create a classification project.
7. Attach resources to the project, and build sequences
A Classification Project doesn't see your Collection's resources automatically — you link them with a Classification projects collection row. Open Media classification → Classification projects collections, click the + icon, and pick your Project and Collection from the two dropdowns. Save.
Back on that same list page, tick the checkbox next to the row you just created, choose (Re)build sequences for selected collections from the action dropdown, and run it with a time interval (default 5 minutes; 15 minutes is common in practice). This groups the collection's resources into Sequences — bursts of frames close together in time — which is what lets the classify view step you through a burst instead of one frame at a time.
8. Classify a resource
This step happens in the Citizen Science frontend, not the Expert admin — on a localhost stack it runs at http://localhost:4200. Open it in a separate tab and log in with the same TRAPPER account (see Log in if you haven't already). Select your project, then open Classification view in the left sidebar.
The project must be flagged as Citizen Science
Your project only appears in this frontend if Is Citizen Science research project? was checked in step 1. If you left it unchecked, go back to the research project's edit page in the Expert admin and enable it — there is no separate classify UI inside the Expert admin itself.
Pick your Deployment from the Filters panel — a grid of thumbnails appears below, one per resource, with a green corner mark on resources you've already classified.
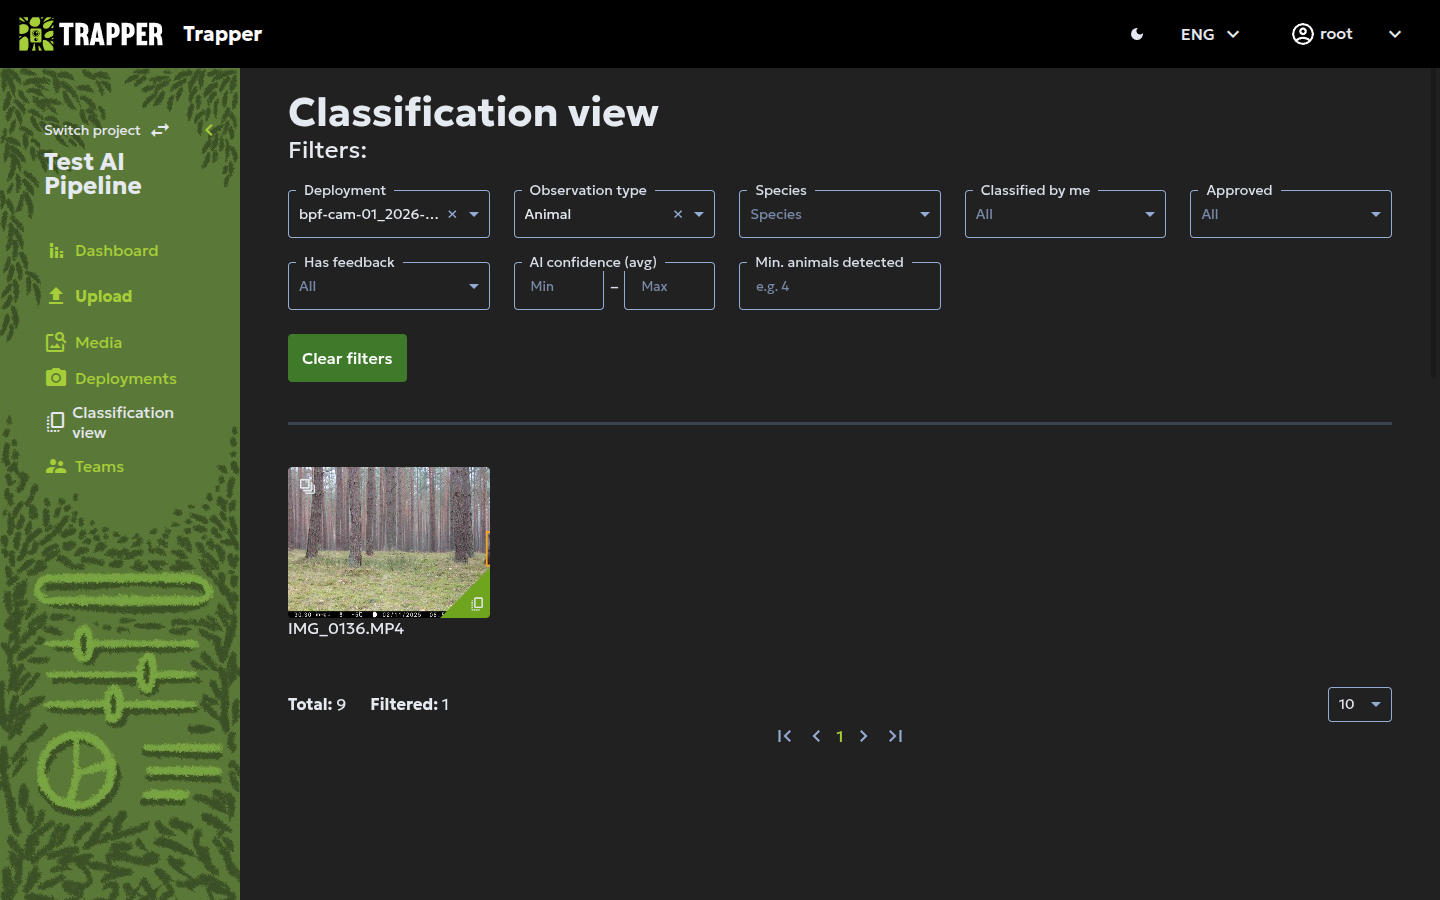
Click a thumbnail's Classify link to open it. The strip along the top shows every resource in the same Sequence, labelled Seq 1, Seq 2, … — use it (or the Previous/Next resource and Previous/Next sequence buttons) to move through a burst without going back to the grid. Each thumbnail also has a Select toggle: turn it on for several frames at once if they should all get the same classification (e.g. an empty trailing burst), which lets you classify them together in one go instead of one at a time.
On the resource itself, click Select new object and draw a box around each animal/human/vehicle (or Add object (no bbox) for an observation that isn't tied to one drawable object, e.g. a group-level count). Fill in:
| Required field | Meaning |
|---|---|
| Observation type | Human / Vehicle / Animal / Blank / Unknown / Unclassified |
| Species | From the Classificator's species list |
| Count | Number of animals/humans/vehicles; default 1 |
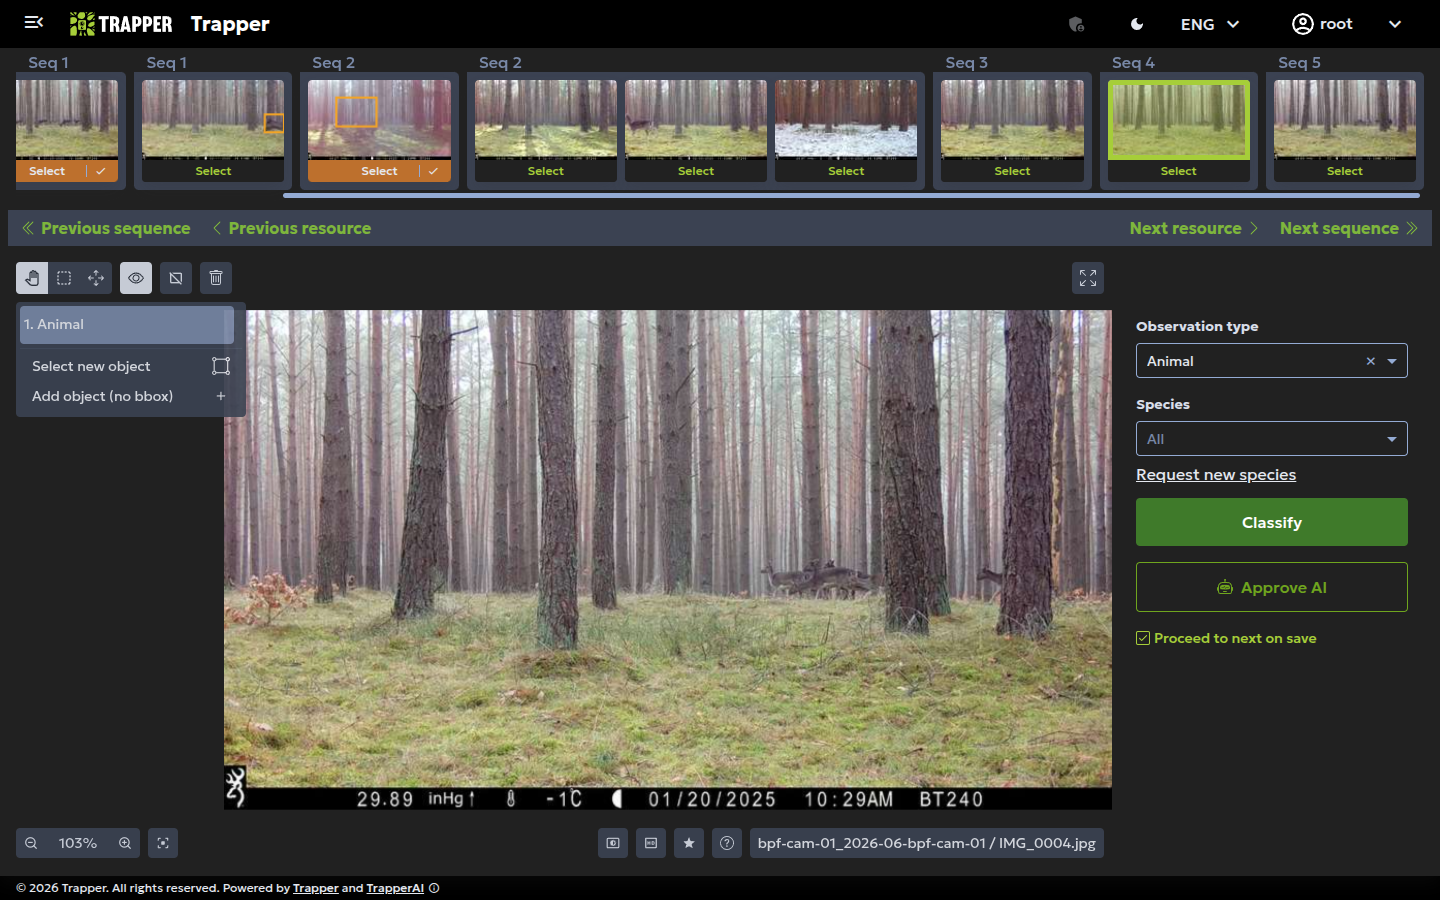
Add a row per animal/object when several are present with different attributes, then click Classify to save it as your own classification. If the resource already has an AI prediction you agree with, you can click Approve AI instead of drawing anything yourself — see Your first AI pipeline run for that flow.
Conventions that keep data clean
- Only start classifying a Deployment if none of its Sequences have been classified yet (the green corner mark shows already-classified resources) — and finish all Sequences in a Deployment once you start.
- Classify empty images as
observation_type = Blank, including trailing empty frames at the end of a sequence. - A person with a dog needs two observations: one
human/Homo sapiens, oneanimal/Canis familiaris. - For groups: if one image shows the whole group, classify per-picture for retention-time estimates. For big or never-fully-visible groups, classify the whole sequence as one count (the maximum seen in any single frame).
9. Approve the classification
Clicking Classify in step 8 only saves your classification — it doesn't make it the project's accepted record yet. That happens back in the Expert admin: open Media classification → Classifications, use the Filters panel to pick your Classification project (the per-project approval actions only appear once a single project is selected), then click Approve USER at the top of the list. This approves every USER classification currently matching your filter, in the background via Celery — there's no need to select individual rows first.
(If you classified by clicking Approve AI directly in step 8, that resource is already approved — no extra step needed. The Expert admin's own Approve AI action does the same thing in bulk, for every AI prediction above a confidence threshold you set.)
Verify it worked
Open Media classification → Classifications filtered to your project: the resources you classified should now have a FINAL row with Is approved checked. The Classification Project's resource counts (visible on its own page) reflect the same thing.