Your first AI pipeline run
At a glance
Go from an AI provider that's already synced to your first automatically-classified resource: wire it onto a project, upload data, watch the pipeline run, and approve the result.
- Time: ~15 minutes once a provider exists; AI run time depends on collection size and hardware
- Who: anyone who's set up their first research project and wants to see AI classification end-to-end
- Prerequisites: a Classification Project with Resources to classify; an AI Provider already registered
Before you begin
- You've followed Your first research project — you have a Research Project, a Collection with Resources, and a Classification Project
- An AI Provider exists and is
is_active=True— if not, do this first: Configure an AI Manager connection then Register & sync AI providers. On a freshtrapper-setupdeployment, the admin wizard usually does both for you already.
This tutorial doesn't explain how providers get registered — it assumes that part is done and walks through what happens once it is. For the configuration details behind each step, follow the links.
The whole run is a round trip between three services — keep this picture in mind as you follow the steps:
sequenceDiagram
    participant E as Expert
    participant M as AI Manager
    participant W as AI Worker

    E->>M: submit AI Classification Job
    M->>W: dispatch resource batches (Celery)
    W->>W: run detection / classification
    W->>M: post results (msgpack)
    M->>E: results available
    E->>E: create AI Classification rows,<br/>ready for your review (step 4)
Steps
1. Wire the provider onto your Classification Project
Open your Classification Project (Media classification → Classification projects) and set:
- Object detection AI model — a
detection-type provider, e.g. MegaDetector v6 - Species AI model (optional) — a
classification-type provider, e.g. DeepFaune v1.3, runs only on objects the detector marked asanimal
Save. From this point on, every newly uploaded Resource in the project's Collections is submitted to the AI Manager automatically — no manual trigger needed.
Full field reference: Create a classification project.
2. Upload (or re-use) some resources
AI processing is triggered by an upload (a trapper-tools run with --trigger, or a Citizen Science upload) or manually from the admin — configuring the project in step 1 doesn't by itself submit anything. If you already uploaded resources while following Your first research project, trigger them now via the admin action described in Run & re-run the AI pipeline; otherwise upload a small batch via trapper-tools with --trigger.
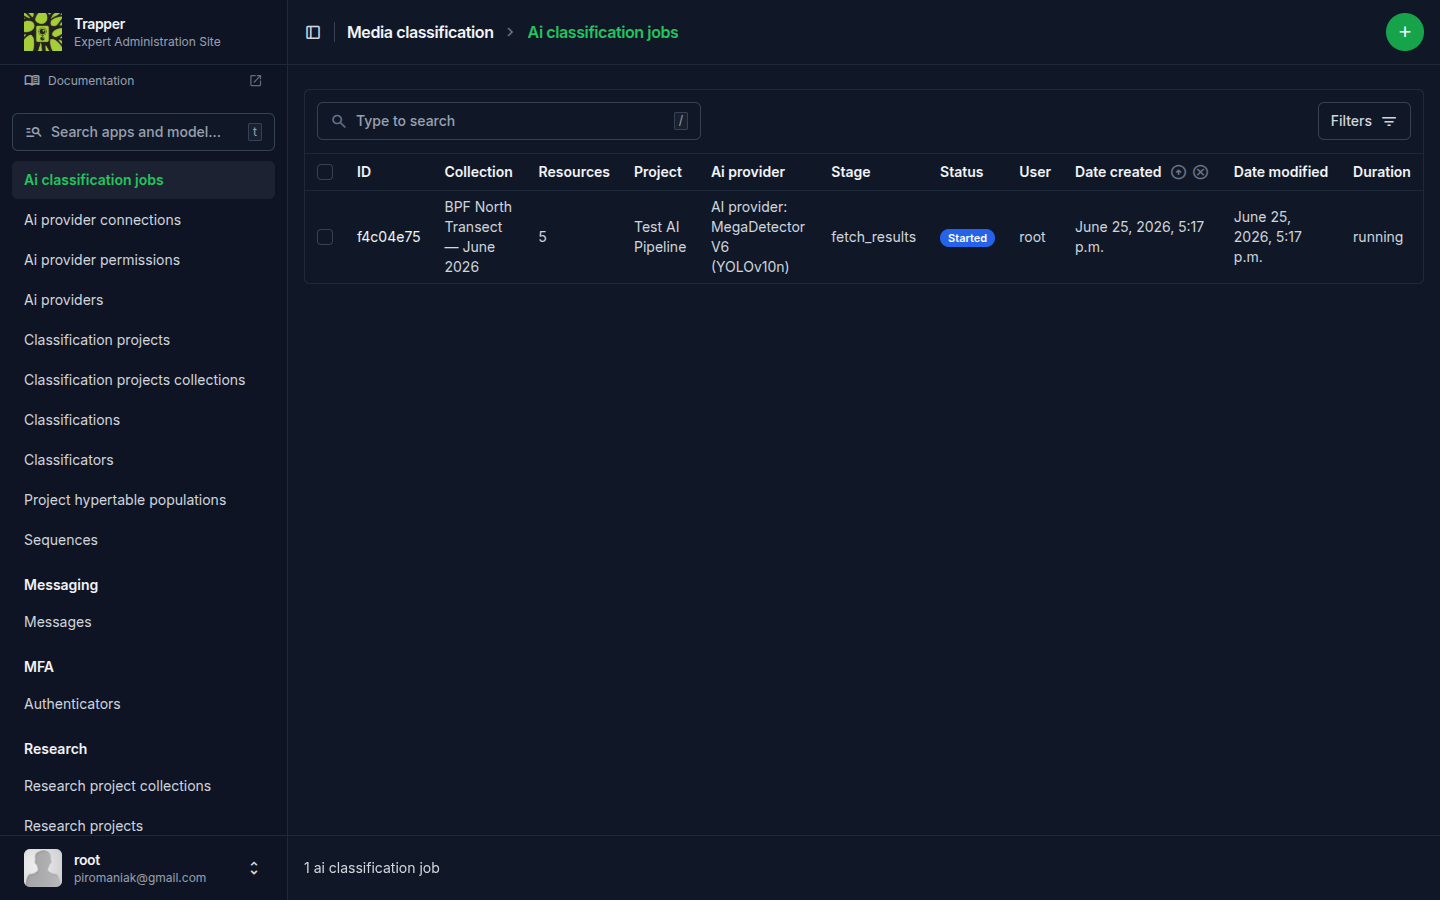
3. Watch the job run
Each submission becomes an AI Classification Job (Media classification → AI classification jobs). The job admin page's Stage column is the authoritative progress indicator — refresh it as the job moves through the AI Manager → AI Worker → back to Expert round trip. The Celery Flower dashboard shows the underlying AI-Manager/Worker Celery tasks — useful for spotting a stuck queue, but it doesn't map one-to-one onto the Expert-side job stages.
A job that never leaves an early stage, or fails, is covered in Run & re-run the AI pipeline.
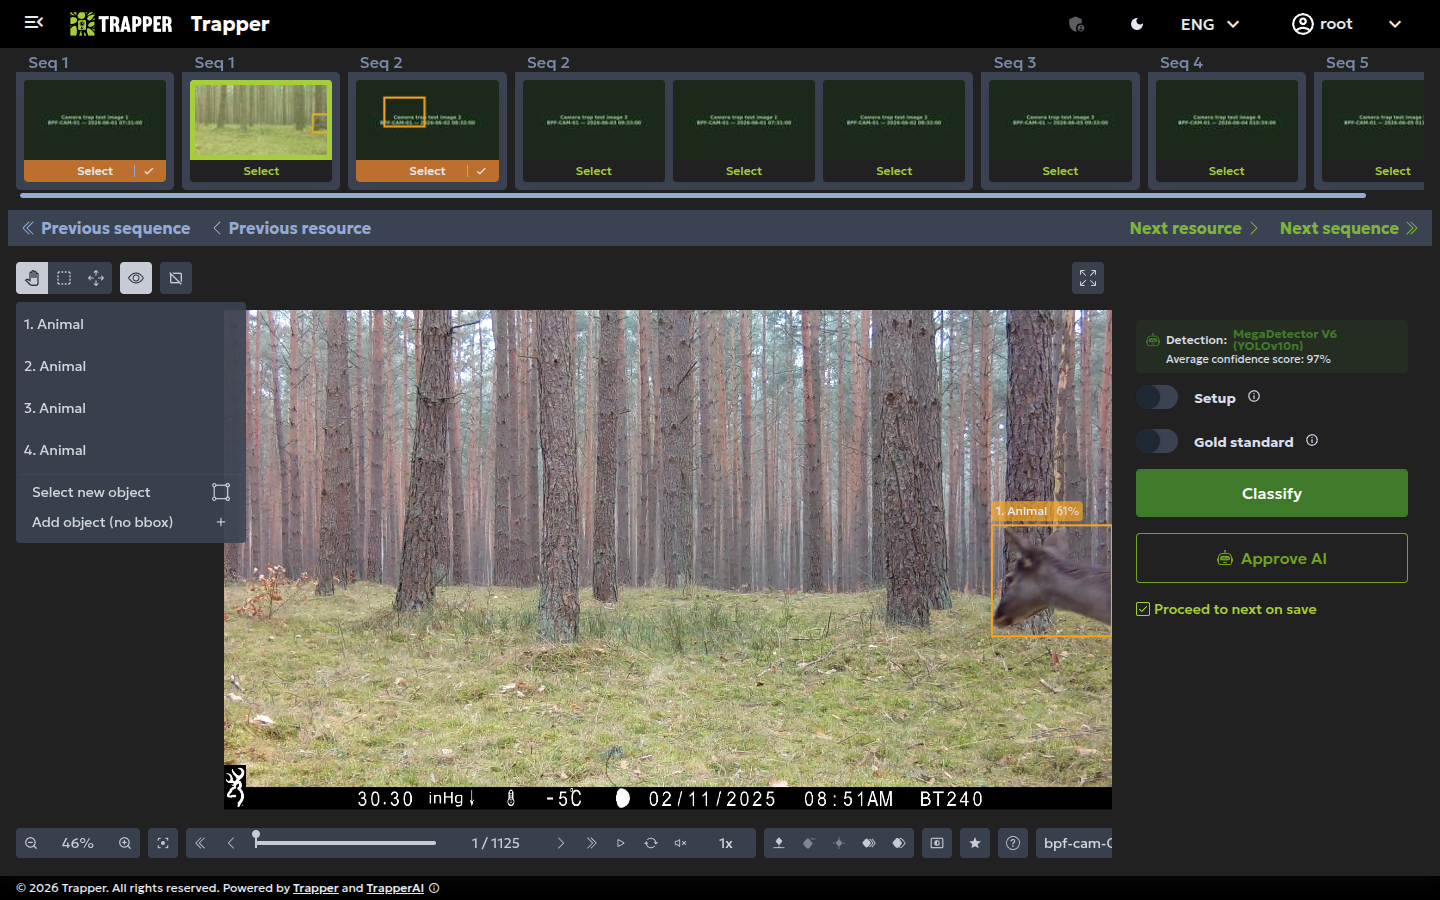
4. Review the AI Classification
Once the job finishes, open one of the processed resources in the classify view. You'll see an AI Classification already populated: bounding boxes, species (if a species model was configured), and confidence scores — all read-only at this point, this is the AI's untouched output.
If nothing shows up here, check three things before assuming it's broken: the job's Stage in the admin (it may simply not be finished yet); whether the AI genuinely found nothing on this particular resource (a real, valid "blank" result, not an error); and — if you can't classify anything yet — whether the project's Required AI classification setting is on, which blocks manual classification until the AI Classification Job for that resource has completed.
5. Edit (fork) or approve directly
Two paths from here, both valid:
If the prediction looks correct, approve it directly — no edit needed. This sets FINAL.is_approved = True with FINAL.source_classification pointing at the AI Classification.
If something's wrong (wrong species, a missed animal, a bad bbox), fork the AI Classification into an editable USER Classification, fix it, then approve that instead. The original AI Classification is preserved untouched — forking never destroys it.
Either way, this is the moment the resource's classification becomes part of your project's accepted record. See Classification model for what's actually happening to the underlying rows.
6. Correct it later if needed
Found a mistake after approval? You don't need to re-open the case — log a FEEDBACK Classification against the approved row instead. It doesn't change the approval status; it's a permanent correction trail for quality control.
Verify it worked
The resource's classify view shows an approved (FINAL) classification with real species/observation data, and the Classification Project's dashboard resource counts reflect it as classified.
Next steps
- Configure trackers — once you're working with video, not just stills
- Distance estimation
- Camtrap DP export — get your classified data out in a standard format